Edit sensor
From the sensor details page click "Edit sensor" to change sensor settings.
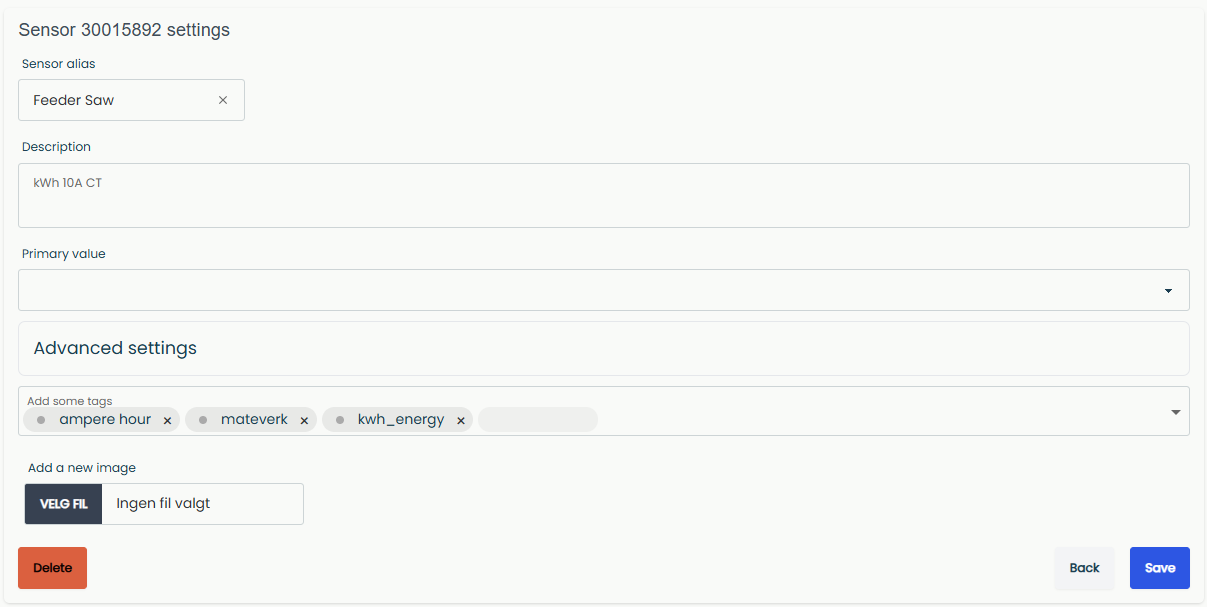
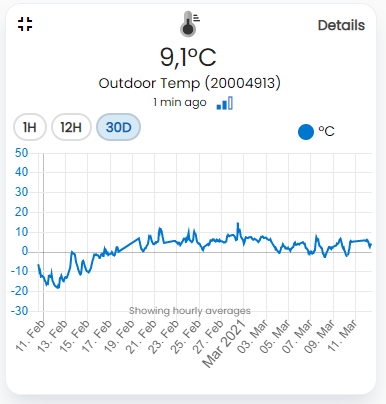
Sensor Alias: Edit the sensor name.
Description: Edit the sensor description.
Primary value: If a sensor has multiple values, like humidity and temperature, choose which value should be the primary value. The primary value is the biggest value in the sensor tile.
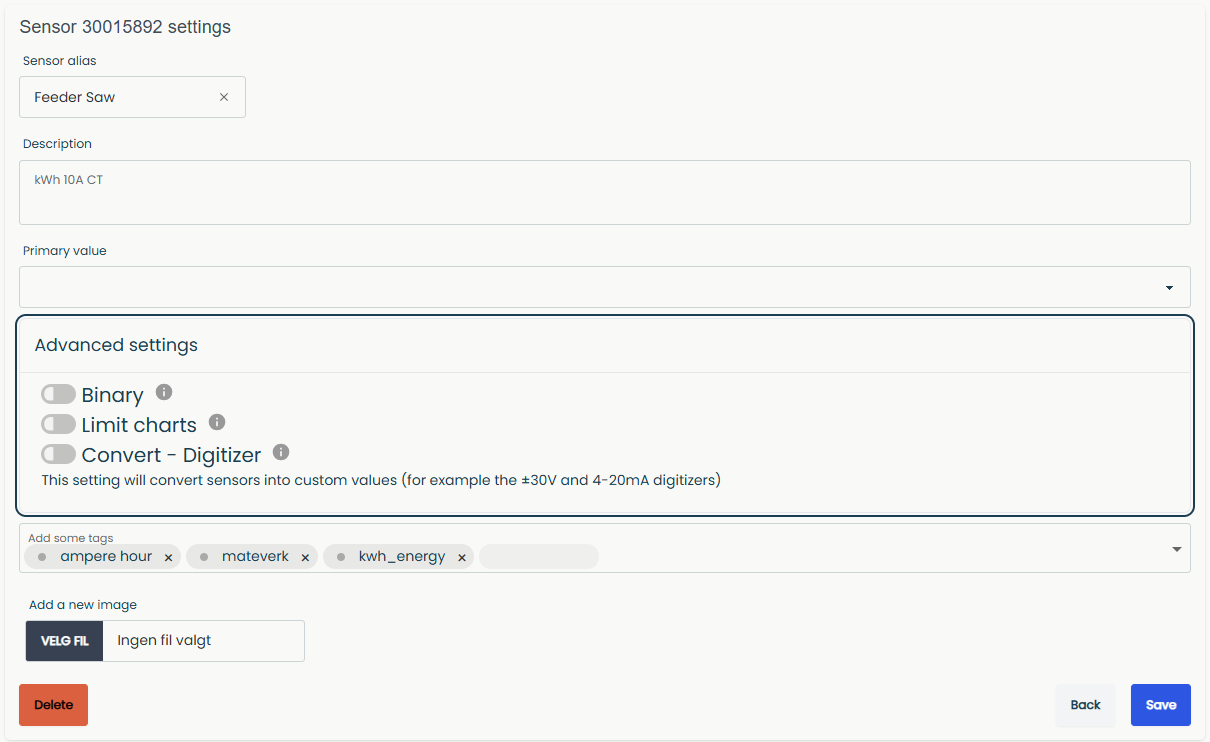
Advanced settings: Open this to adjust some advanced sensor settings. More info below.
Tags: Click to add existing tag or click the darker gray area to create a new tag.
Use tags to filter sensors easily or make groups of sensors and gateways in your system.
Add an image: Click here to add a picture of the sensor and its location.
You can add an existing image from your device or you can open the camera and take a picture.
Delete: Click Delete to delete the sensor from system. Then confirm to delete.
If you delete the sensor from the system, you will stop receiving sensor data from the sensor but it can then be added to another system.
Cancel: Back to sensor details without saving any changes.
Save: Save changes and return to sensor details.
Advanced settings
Binary settings
Click the binary button to make the sensor a binary sensor.
A binary sensor can only have two values like 0 and 1. But we can name the two values what we want. Examples: True / False, On / Off, Hot / Cold, Open / Closed, Jacket / Sweater.
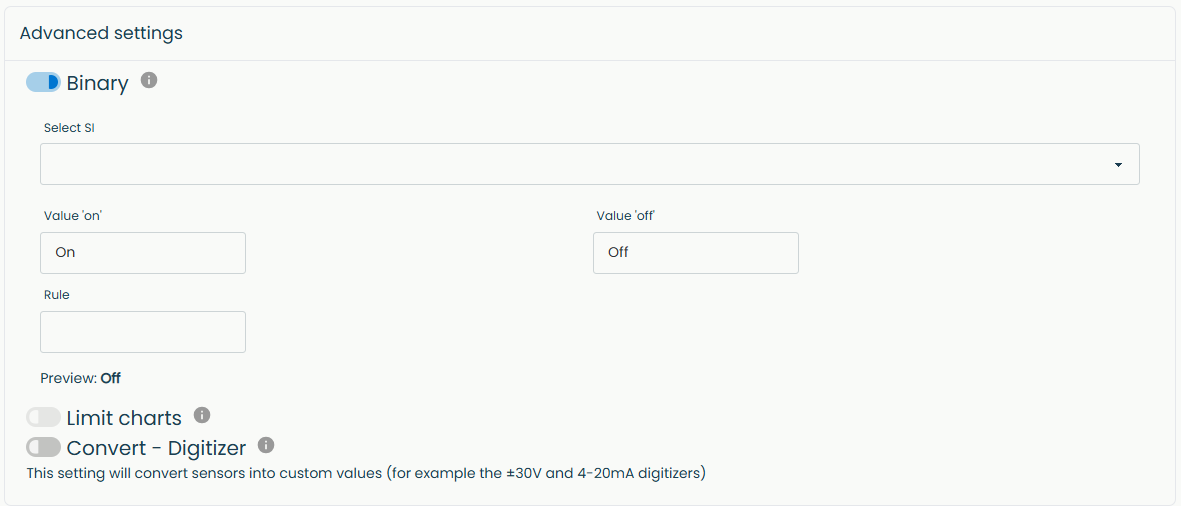
Selected item: If the sensor has several values, like vibration and temperature, choose which value you want to make binary.
Value 'on': Name the on value.
Value 'off': Name the off value.
Rule: Values bigger than this value and binary value will show value 'on'.
In this example temperatures bigger than 50 will show "on". All other values will show "off".
The system might need a new sample from the sensor to activate the binary setting. Some of this is still under development.
Limit charts
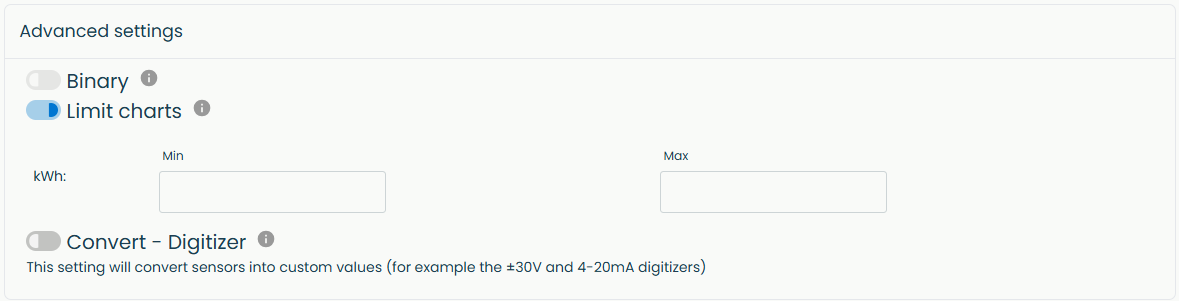
If you do not prefer autoscaling on the Y-axis but want custom chart limits you must set the Min and/or Max values .
Min: Minimum value on Y-scale.
Max: Maximum value on Y-scale.
You might have to wait for a new sample from the sensor and change view/time scale before the changes take place.
Convert - Digitizer
If you have a digitizer or need to convert sensor readings, you can use the Convert - Digitizer functionality.
Configuration helpers
Custom is the default setup where you will need to input information as shown below. We have also made predefined input fields for some sensors, such as the Neuron kWh Energy Meter and the Neuron Pulse Counter.
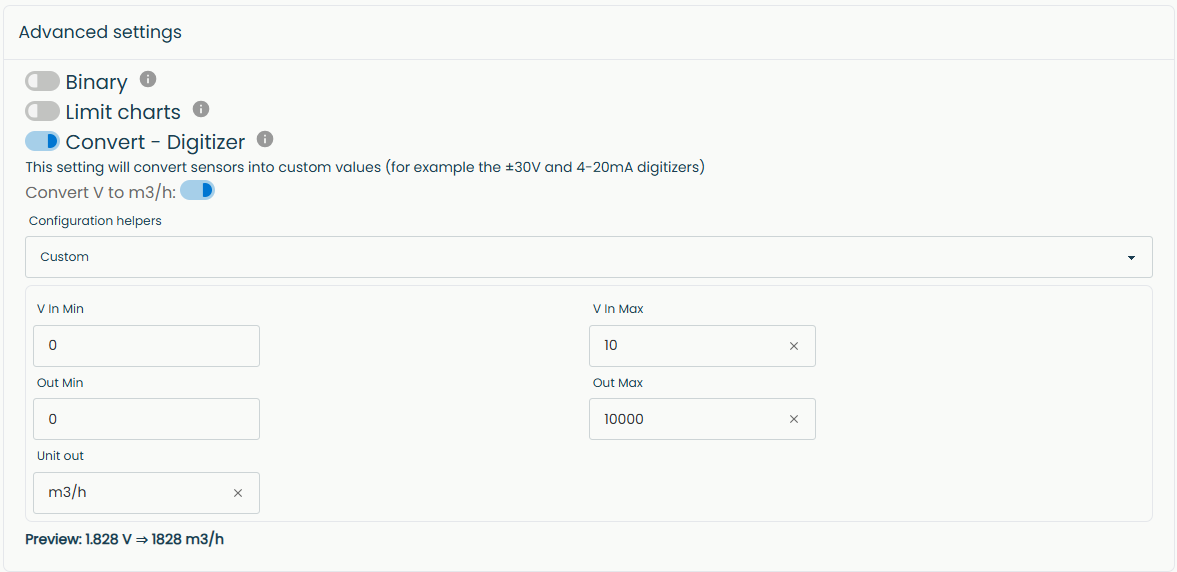
Custom
Below is an example of how to configure a VDC Digitizer with custom settings.
Convert V: Choose which value to convert. Some sensors have multiple values.
In min: Min value in from VDC sensor.
Out min: Corresponding value out from connected equipment.
In max: Max value in from VDC sensor.
Out max: Corresponding value out from connected equipment.
Unit out: SI of sensor data.
Preview: Preview of data with current settings.
This example shows a VDC Digitizer connected to an air flow sensor with 0-10VDC output. 0V equals 0m3/h and 10V equals 10000m3/h.
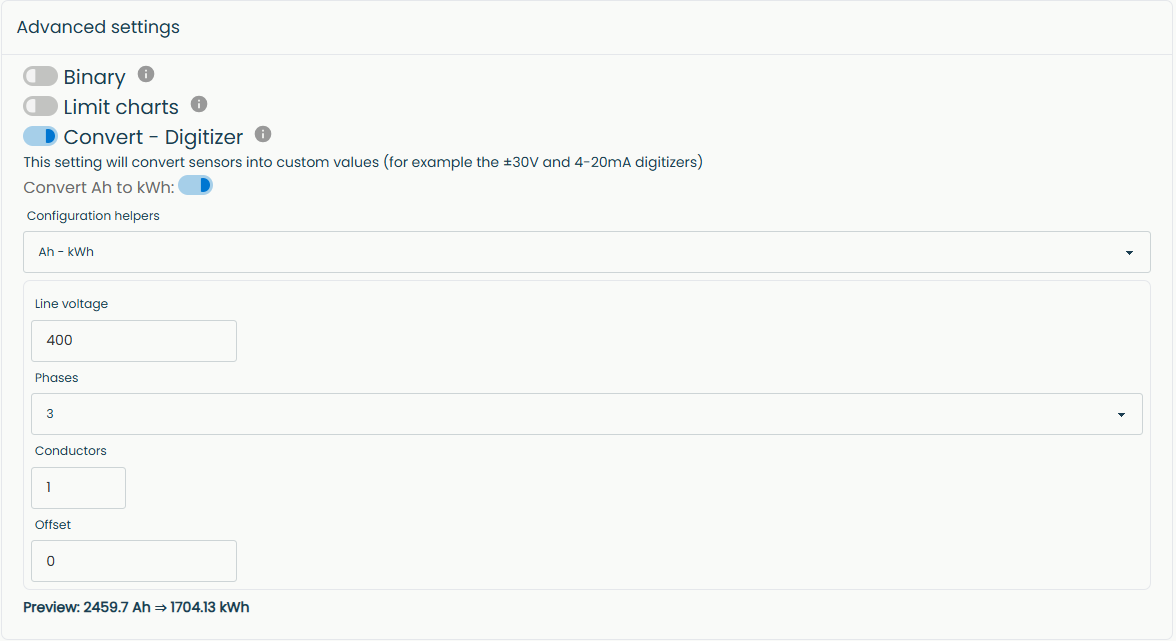
Ah - kWh
If you have a Neuron kWh Energy Meter you will have to input some information to be able to get correct reading. The sensor itself measures Ah (Ampere hours). To convert to kWh you need to enter:
- Line voltage
- Number of phases
- Number of conductors - for high amperage circuits multiple conductors in parallel may be used for each phase. Current will split equally between the conductors and you only need to install a sensor on one of them and enter the total number of conductors
- Offset - The sensor stores the accumulated measurement value internally, and cannot be deleted. To, for example, set reading to 0, an offset value must therefore be inserted here. Insert the last reading with a - (minus) in front and it will show 0 kWh in the app.
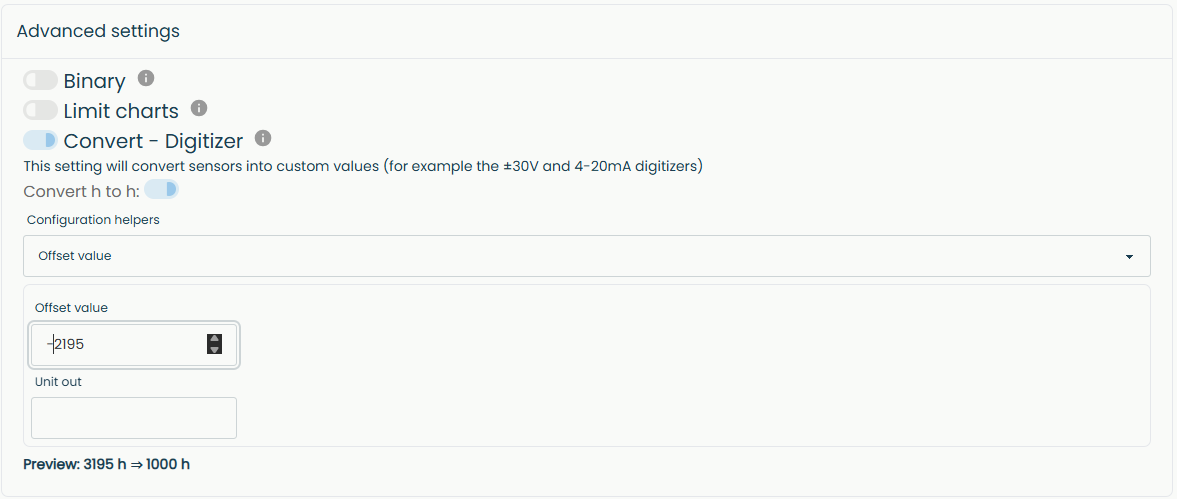
Offset value
If you, for example, have a new hour counter and would like it to show the hours on a used vehicle you can add the hours here. Or deduct hours as shown below.
Pulse conversion
If you have a Neuron Pulse Counter you will need to enter what a pulse represent. In the example below the connected meter generates 1 pulse for every 10 kWh.
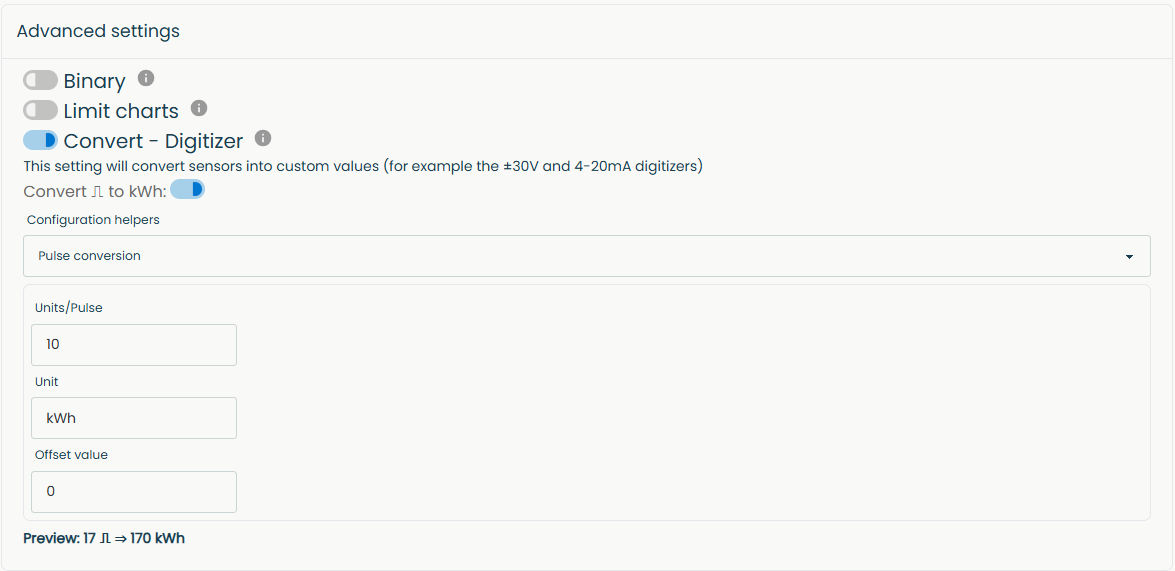
You might have to wait for a new sample from the sensor before the changes take place.
Actuator config
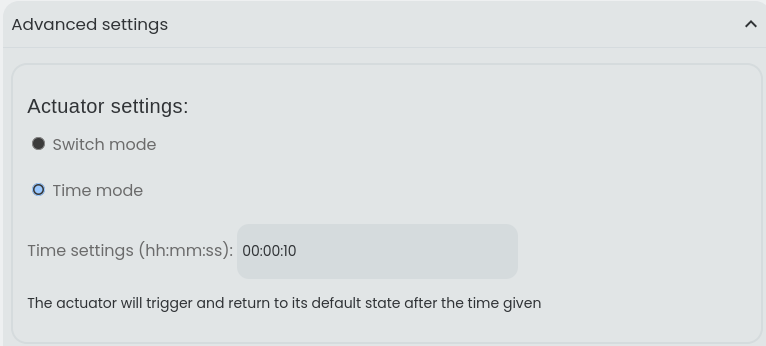
Above is an example of how to configure an Actuator to switch for 2 seconds on each button press.
Switch mode: In "Switch mode" it will switch from open to closed or vice versa, dependig on the former state, on each button press in the tile.
Time mode:
In "Time mode" it can be configured to stay open or closed in the configured time. In the example above the time is set to 2 seconds. You can also set the number og minutes or hours to stay in the same state.