Introduction
Our Neuron Pulse Counter are excellent when you want to gather and store data from your new or existing meters with pulse output. In this article we show how to set up the sensor to output the correct reading.
Connecting the sensor
The Pulse Counter supports different pulse outputs - S0 pulse interface, Dry Contact and 5V digital. The sensor is supplied with a 2m cable for easy connection to your meter.
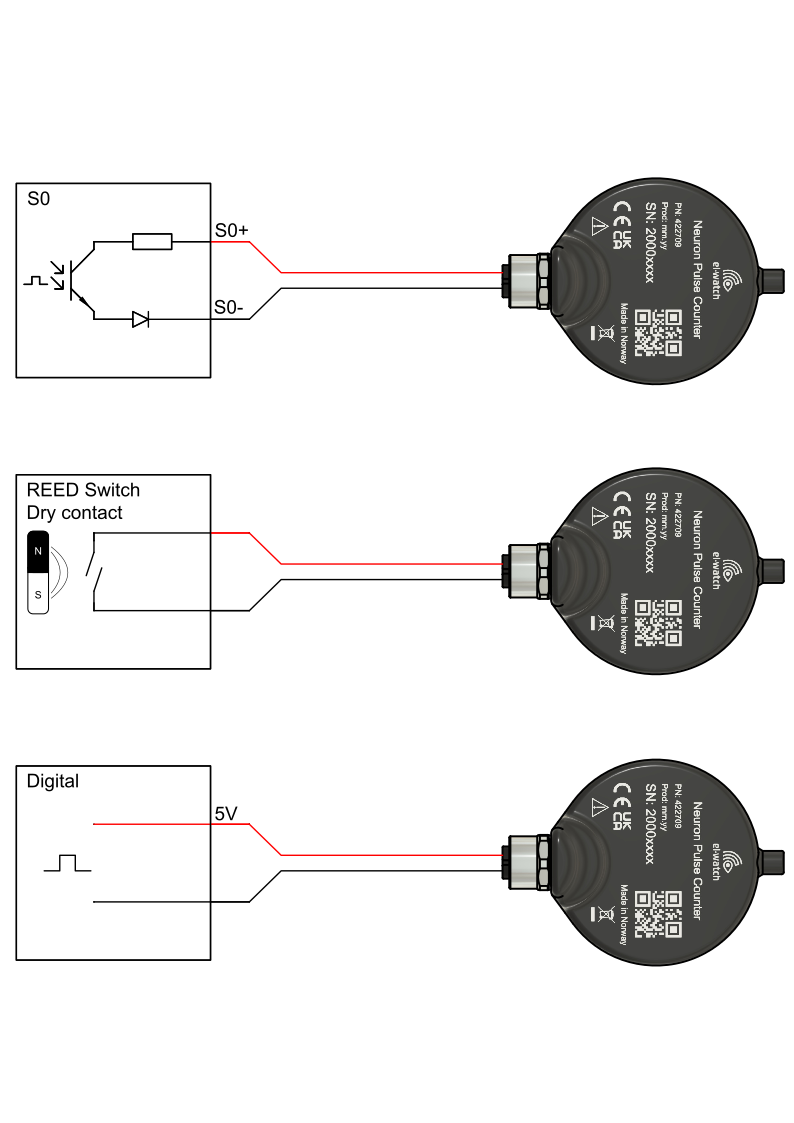
Applying a voltage over 5.5V will result in permanent damage to the device.
Do not short the wires together or keep the measured signal closed for long periods of time. This will greatly decrease the sensor battery lifetime.
Setup
After adding the sensor to your system, go to the Edit sensor from the sensor details page to configure sensor settings. Choose Pulse Conversion under Configuration helpers for easy set up.
Prior to setting up the Pulse Counter in the app you will have to know:
- Unit of the connected meter, e.g. m3
- Number of pulses per unit (stated in datasheet of the connected meter)
- Current reading - if the connected meter have been operating prior to installing the Pulse Counter
The sensor operating lifetime is heavily dependent on the measured signal frequency. If you connect to a meter which have adjustable pulse output we recommend setting it to the highest possible output level. Example: Your kWh meter can output a pulse for every 1 kWh and 100kWh, choosing 100kWh for each pulse will increase battery lifetime significantly.