Introduction
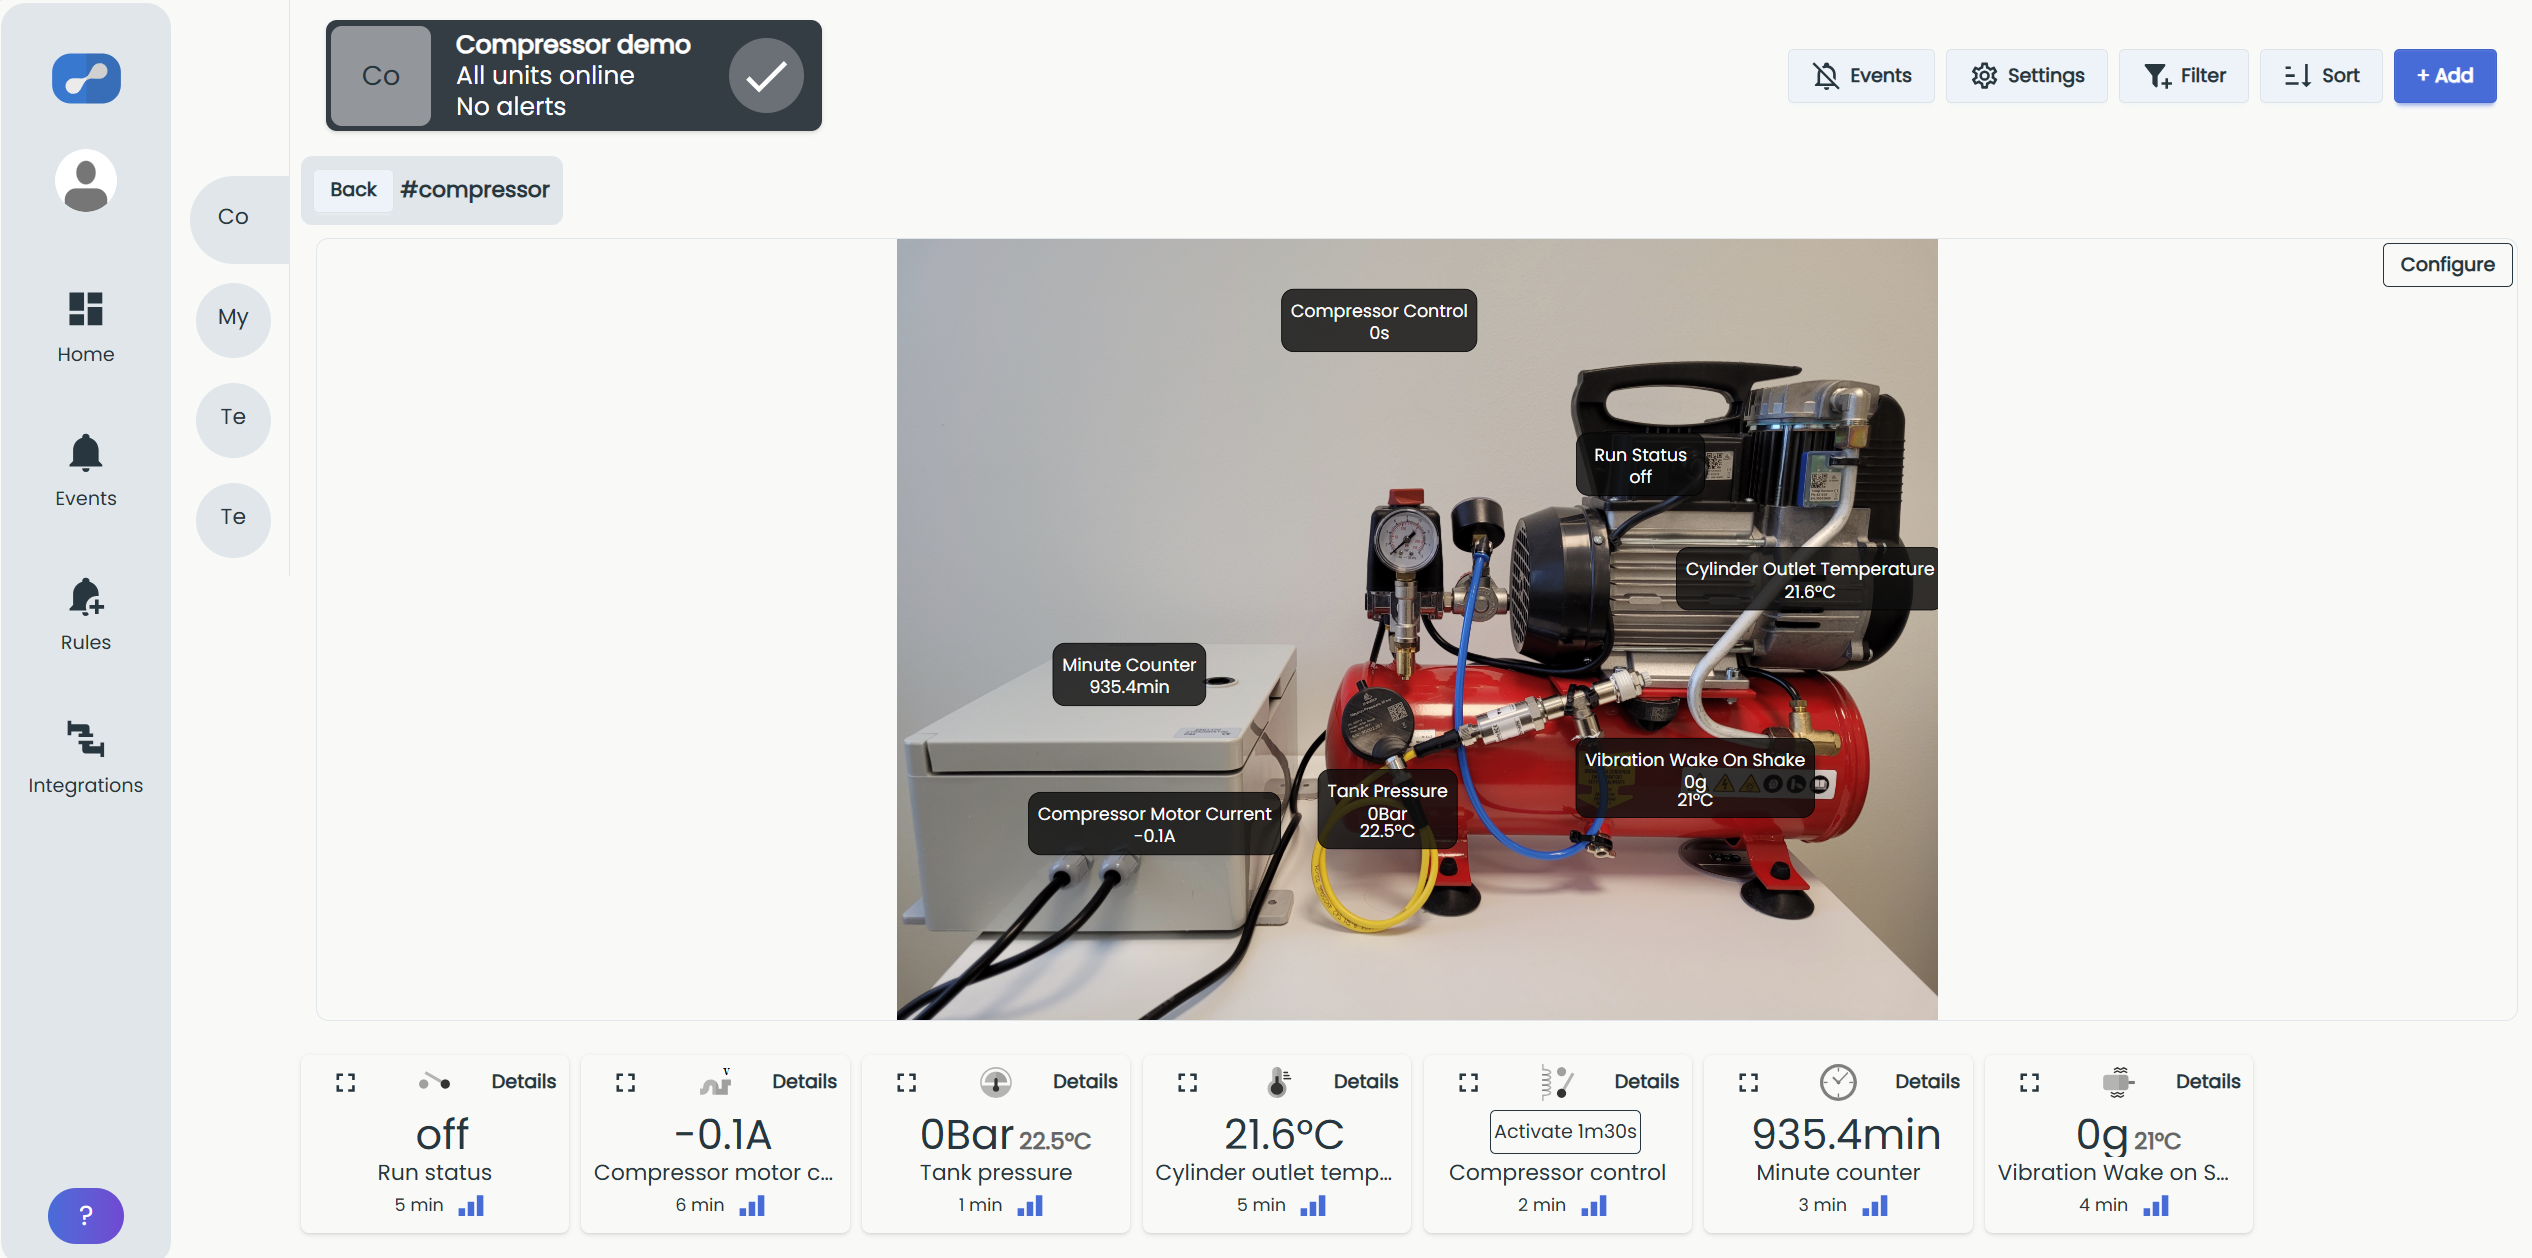
An object view lets you place your sensors directly onto a picture of the equipment they monitor, such as a photo of a machine, a floor plan, or a process diagram. Instead of reading values from a list, you see each measurement positioned exactly where it is taken, so it is immediately clear which sensor belongs to which part of the installation.
Like a group, an object view is built from tags. You give the object view a tag to collect the relevant sensors, then place each sensor on the picture using its own unique tag.
Setup
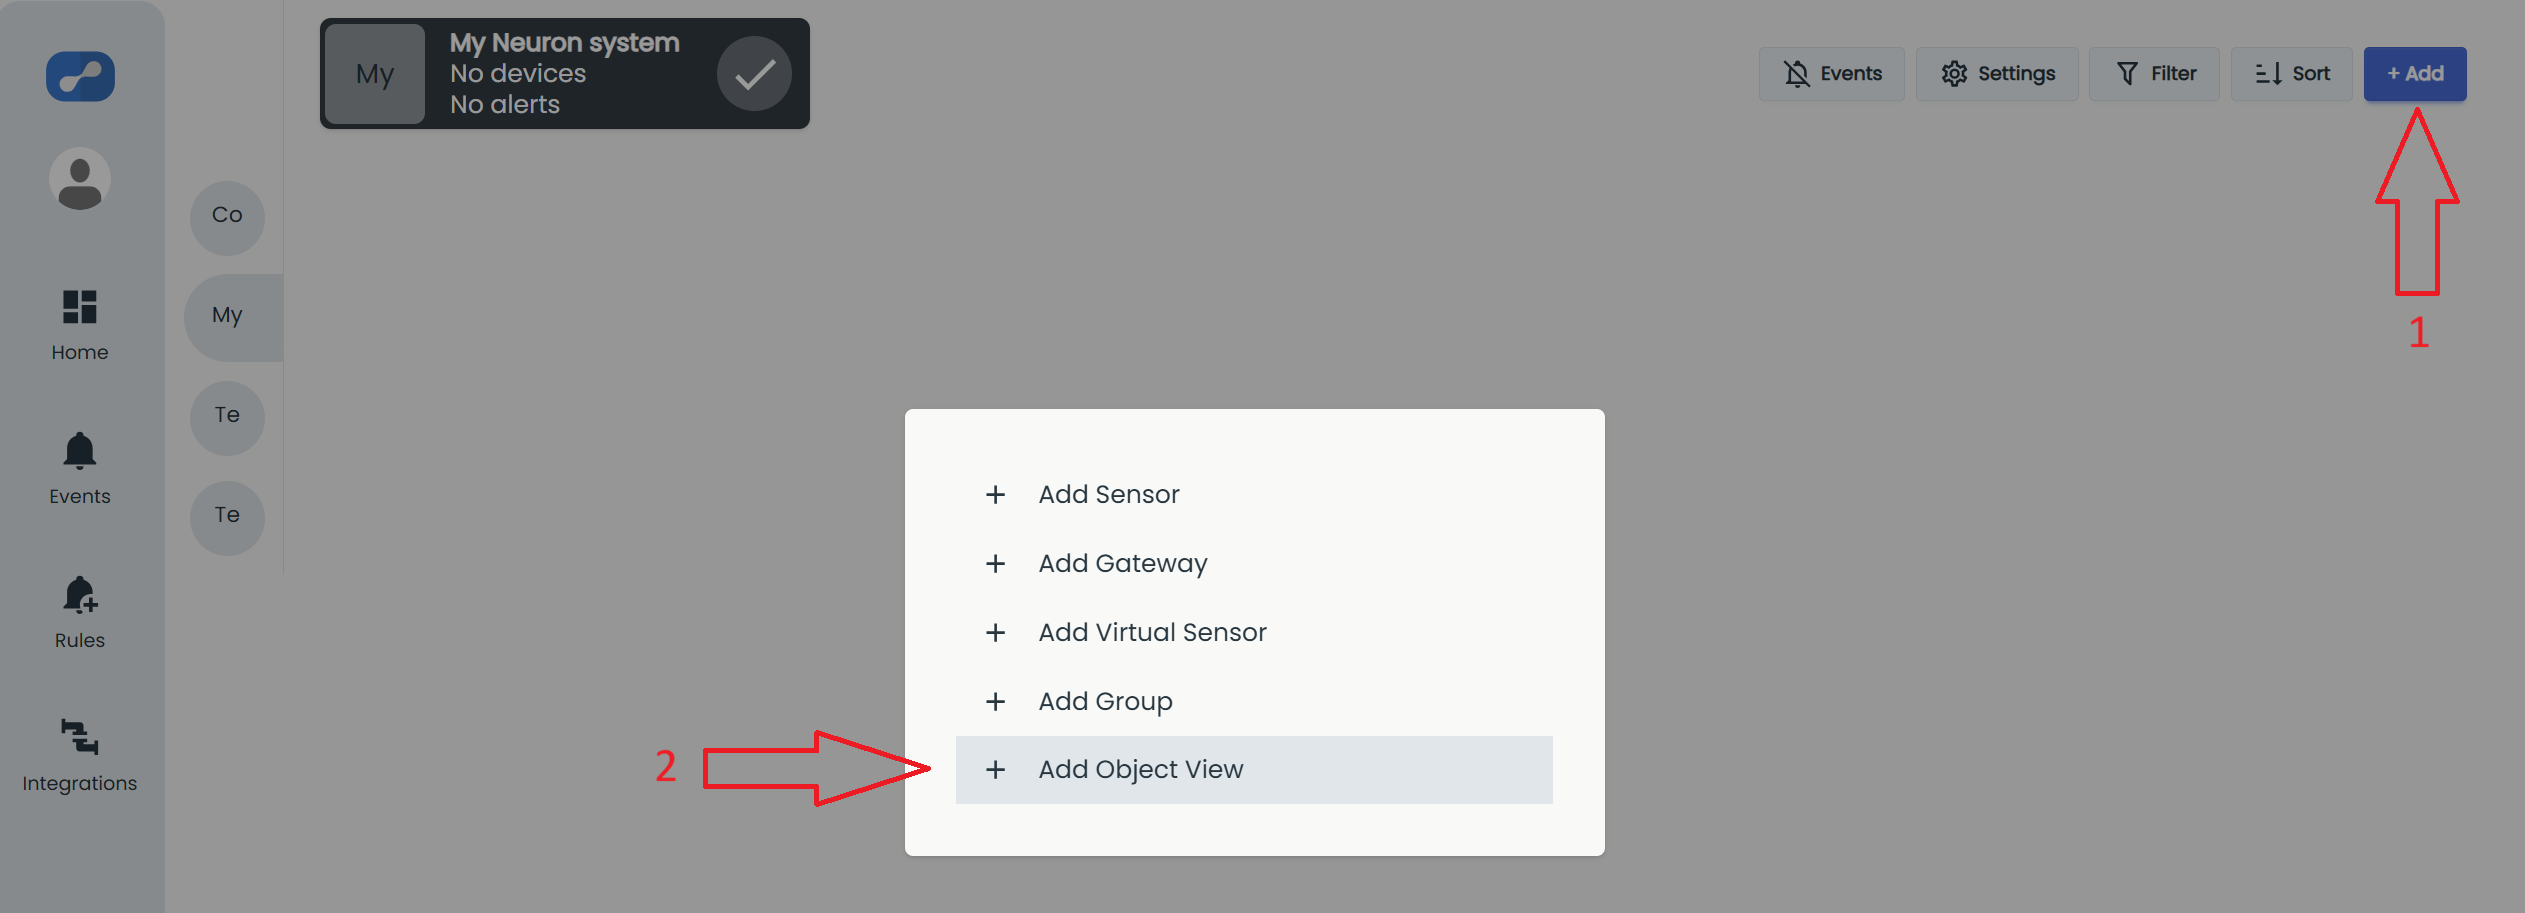
From inside a system click "+ Add" (1) and "Add Object View" (2):
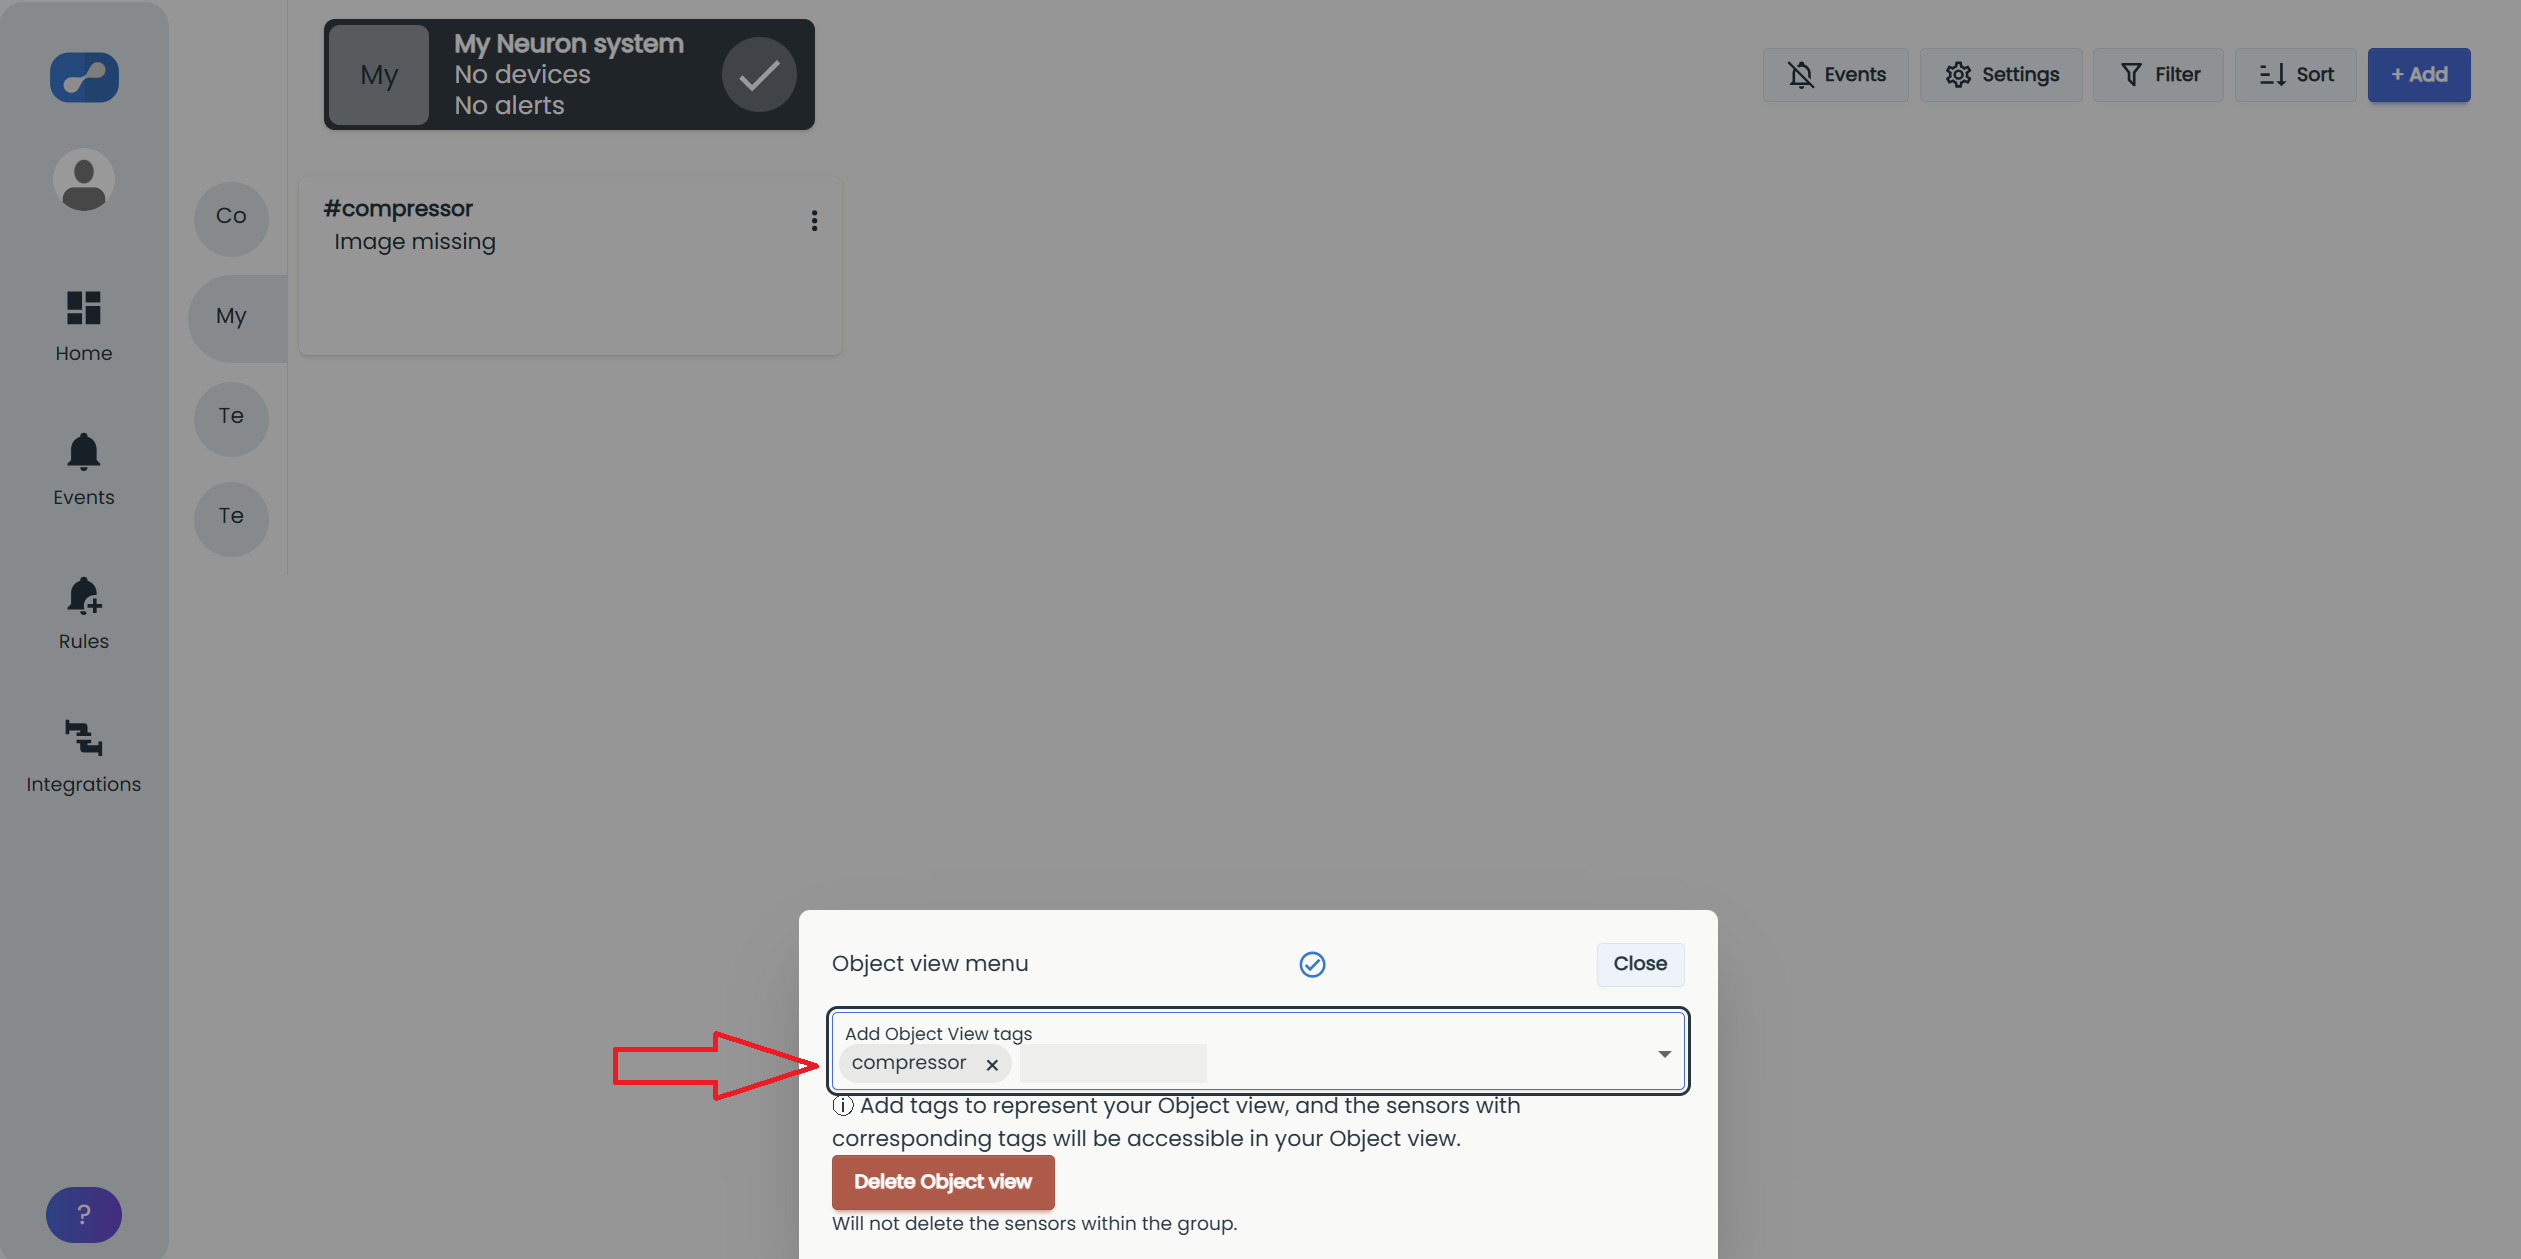
In the "Object view menu", type a tag in the "Add Object View tags" field. Pick an existing tag or create a new one. The tag is added as soon as you select it.
If you no longer need an object view, click "Delete Object view" in the Object view menu. Only the object view is removed; the sensors and gateways keep their tags and remain in the system.
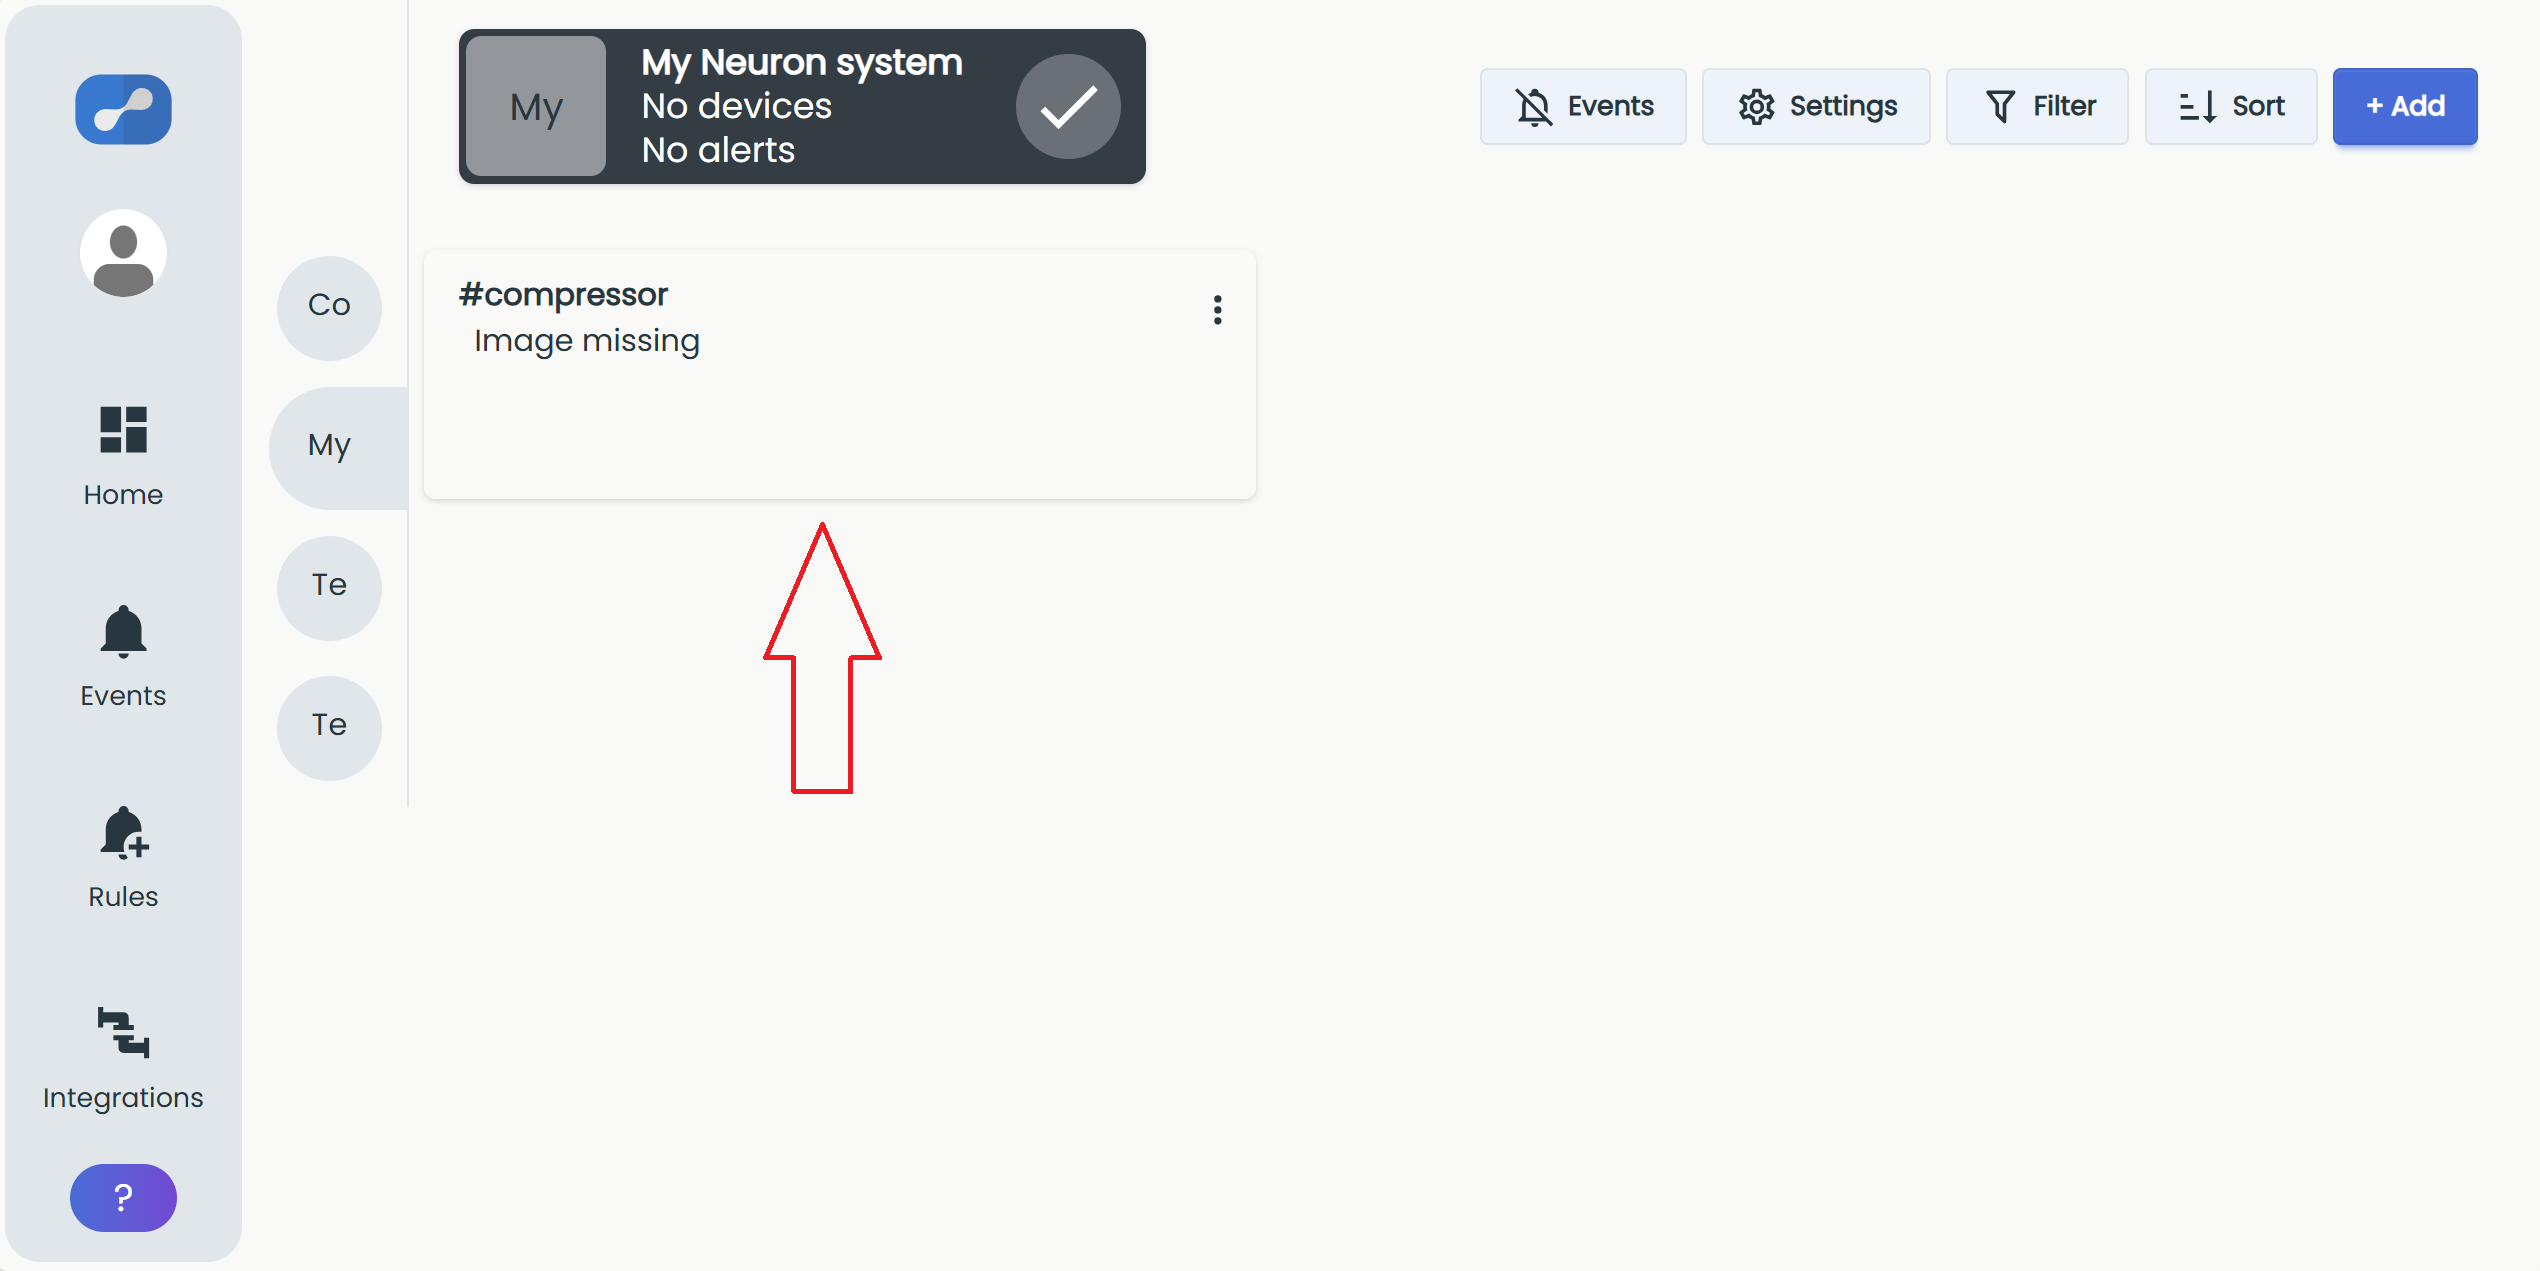
Sensors and gateways with that tag then become available in this object view.
Open your newly created object view.
The object view’s own tag decides which sensors are available here. To place a sensor on the picture, that sensor also needs its own unique tag. You position the tag, not the sensor.
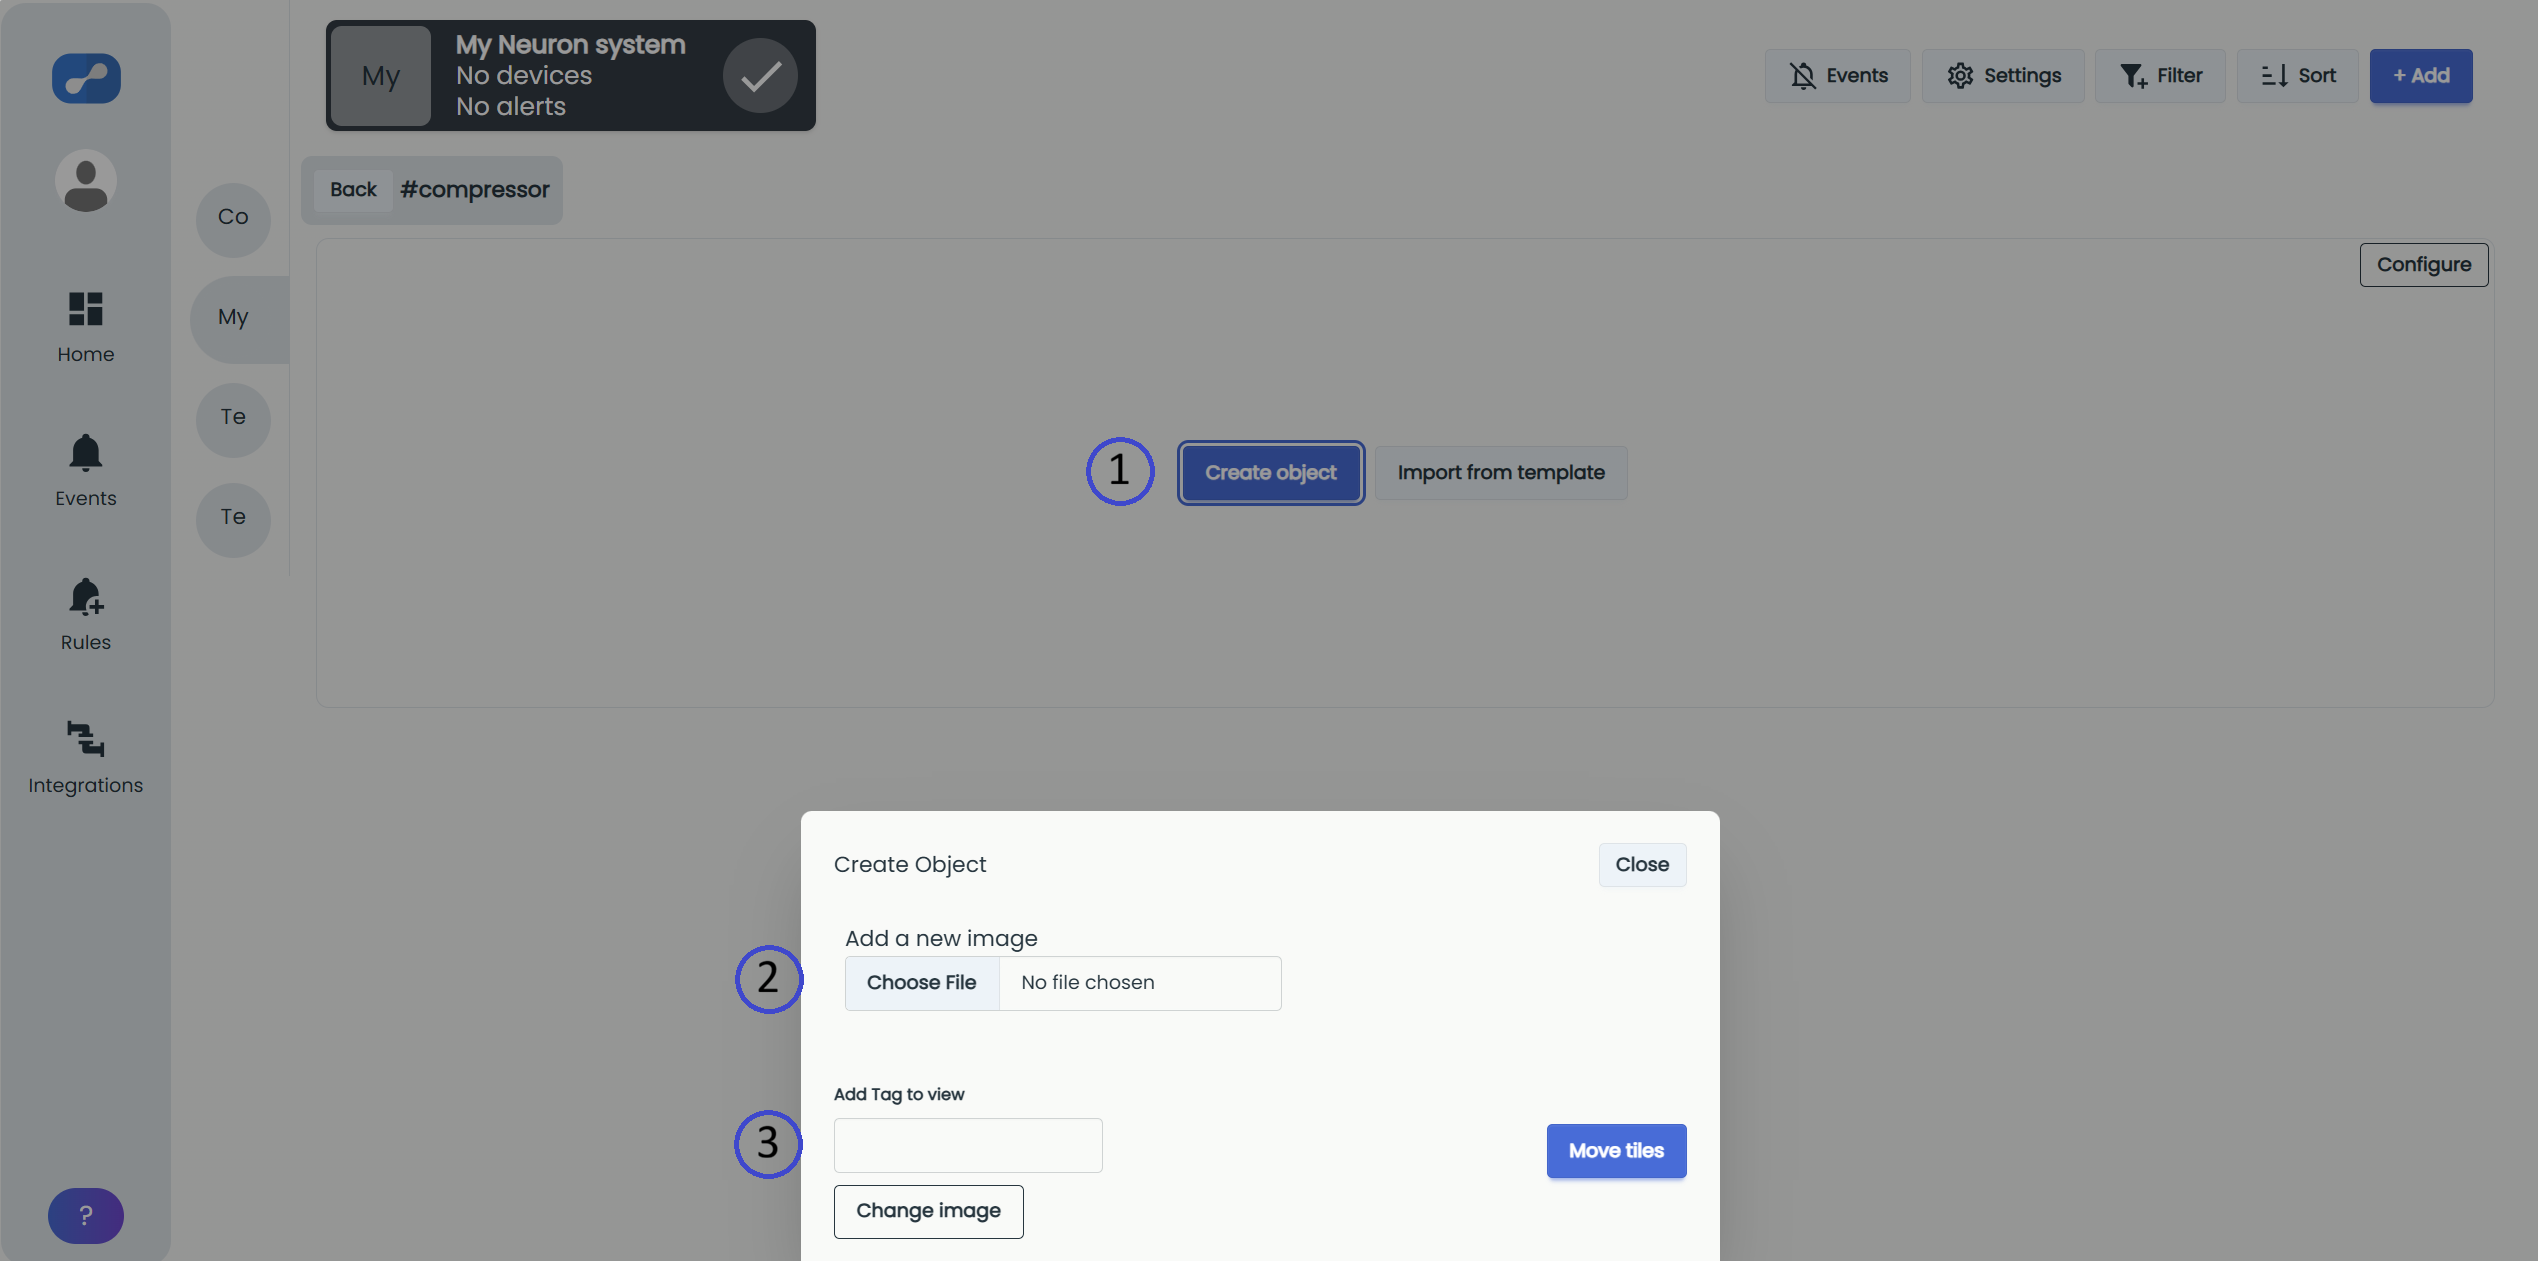
Inside the object view, click "Create object" (1). In the dialog, add a background image with "Choose File" (2), then use "Add Tag to view" (3) to add each sensor you want to show. Finally, drag the sensor tags onto the picture and click "Move tiles" to save their positions.
A sensor will only appear on the picture if it has its own unique tag. Sensors that share a tag cannot be told apart and placed separately.