Getting Started
This guide will show you all the necessary steps to getting started with Neuron Sensors.
Creating a User
Signing up
The first step to Neuron Sensors is creating your own personal user account.
Start by going to web-app at https://www.neuronsensors.app/
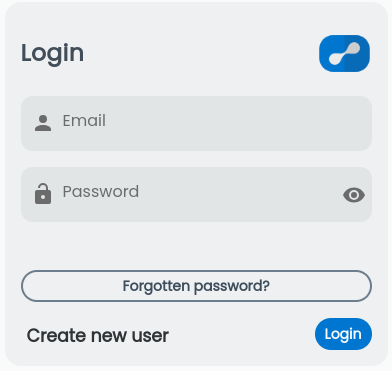
Here you are greeted by a login menu.
Select "Create new user".
This will take you to a sign up form where you add your email and password.
Don't forget to sign up for our newsletters to receive awesome updates about new products and features!
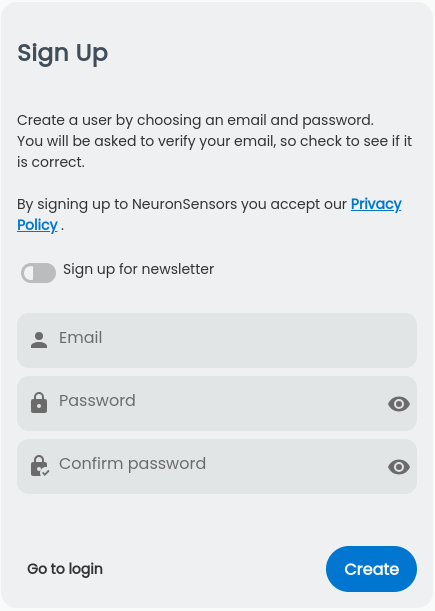
Click "Create" to finish.
After creating your user account, you will shortly receive an e-mail to verify your account.
We recommend that you install the NeuronSensors app to your computer/tablet/phone to get the best user experience. Read how to in this article: Install neuronsensors
Signing in
When your account is verified, you are ready to log in!
Go back to the front page and fill in your credentials and click "Login".
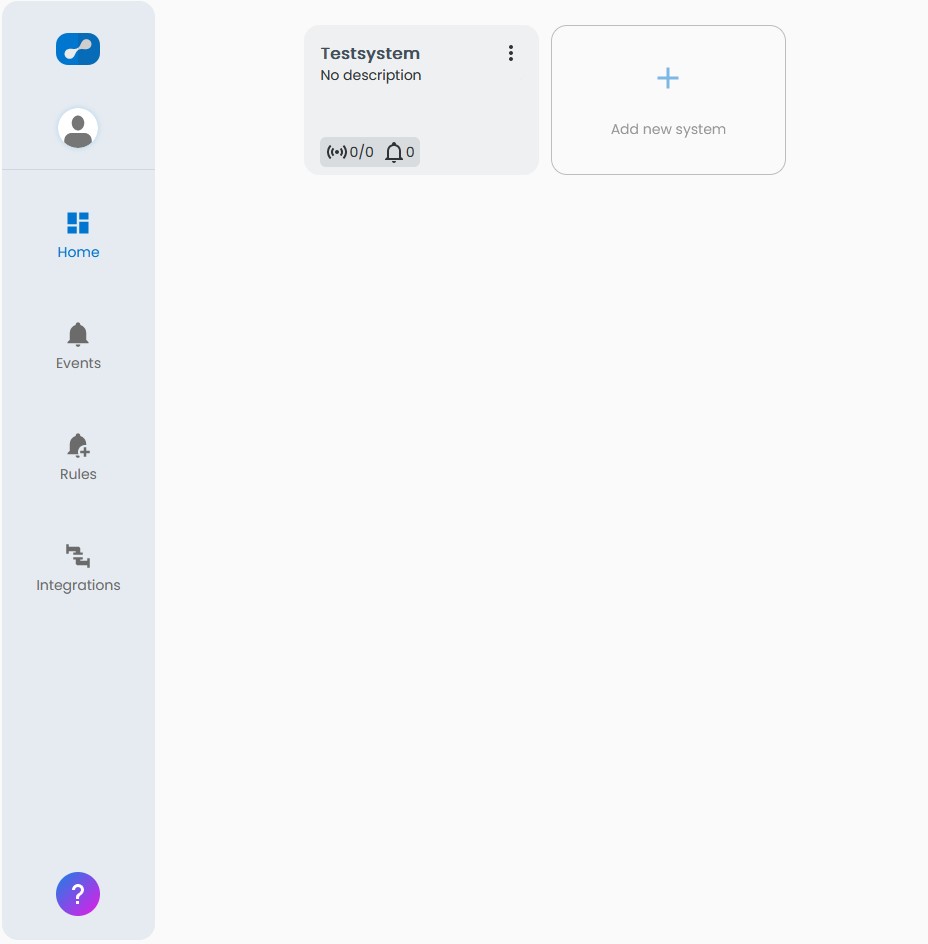
This will take you to your dashboard where all sensors and systems are maintained.
The privacy policy must be accepted to continue using Neuron Sensors! You can read it here: Privacy Policy
User Settings
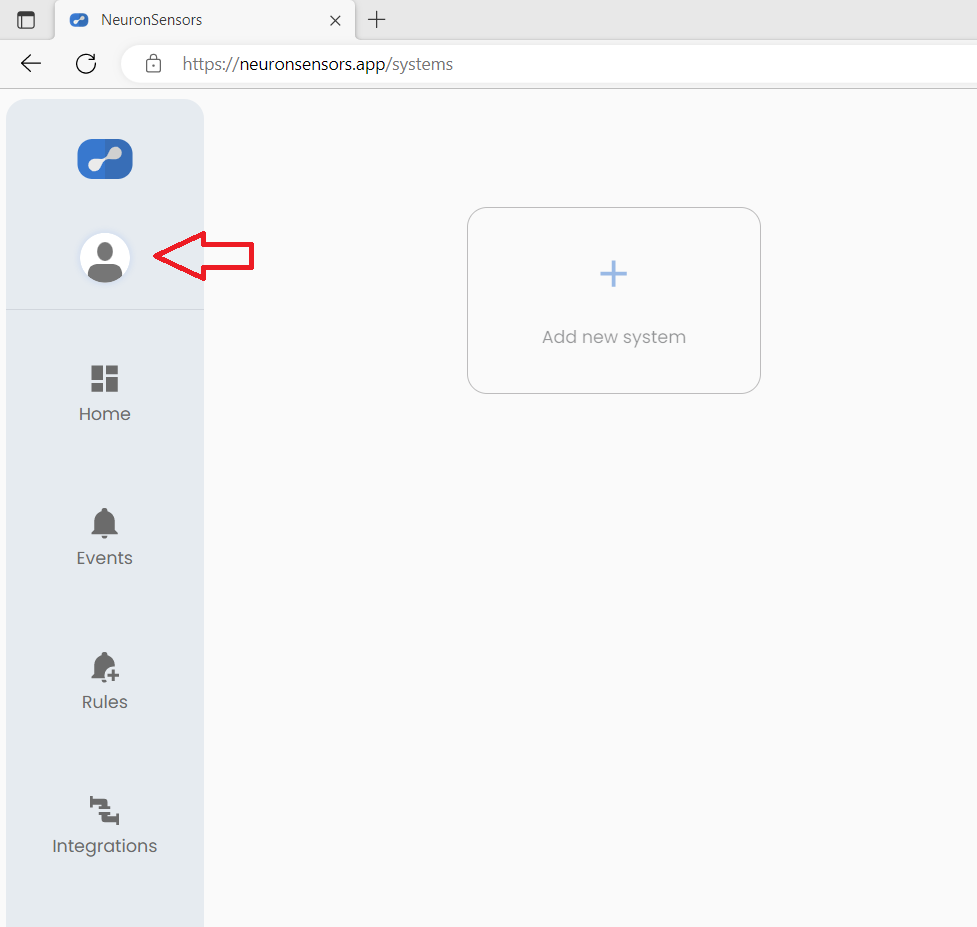
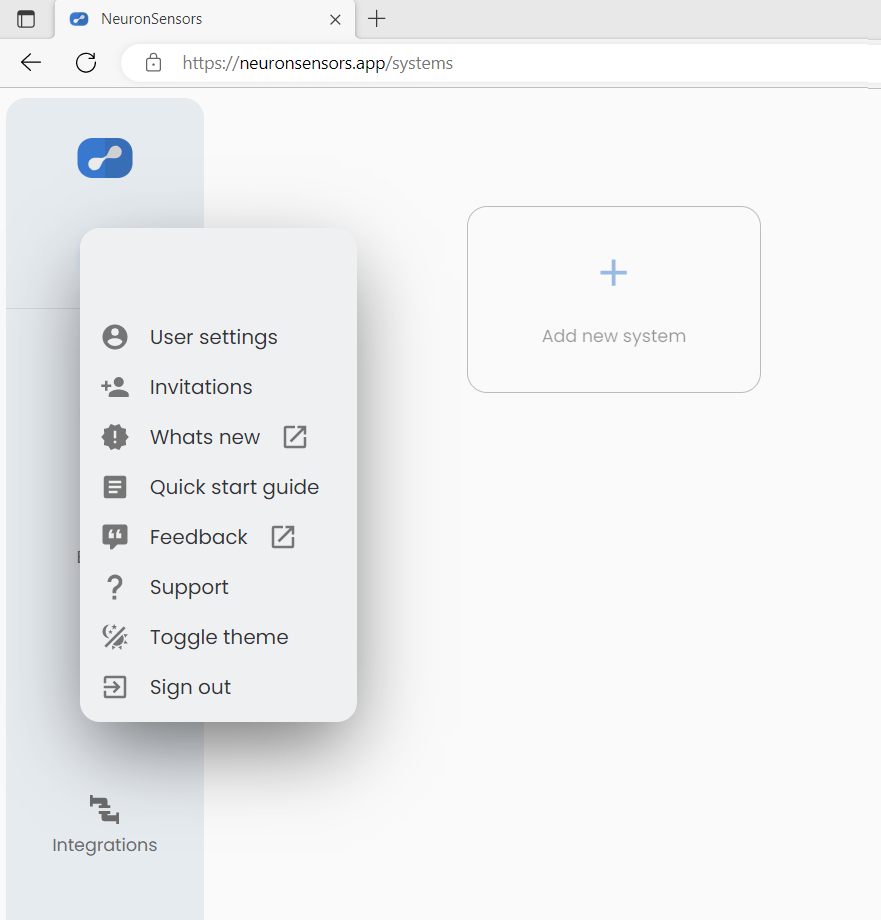
The user menu can be found by clicking on your avatar picture.
From there you can find various options, most notably the user settings and pending invites
To get SMS alerts from the Neuron Sensor App, you need to add a phone number to the User Settings. In addition, SMS alerts need to be configured as shown in the article New Rule.
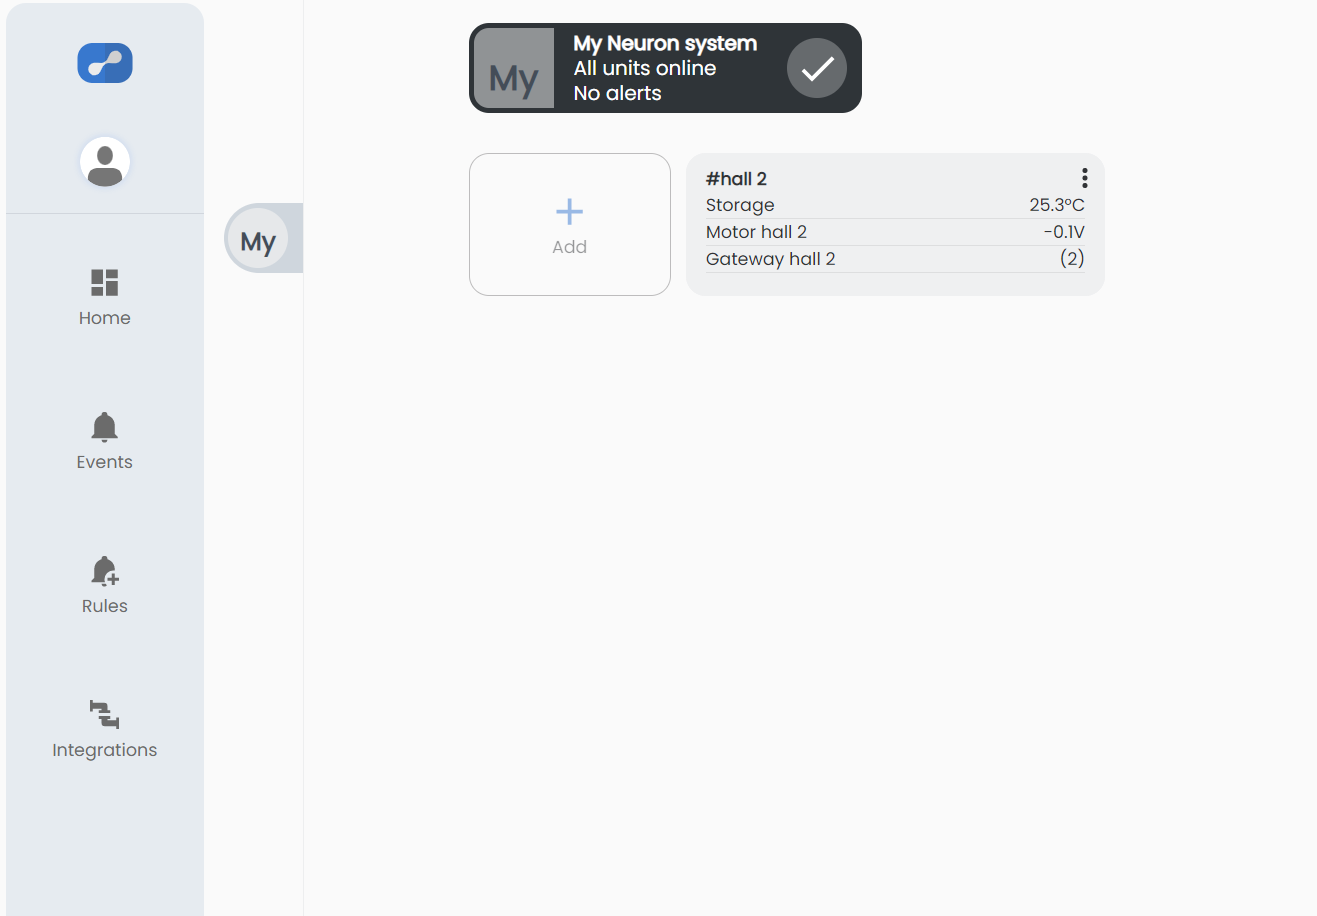
Creating a System
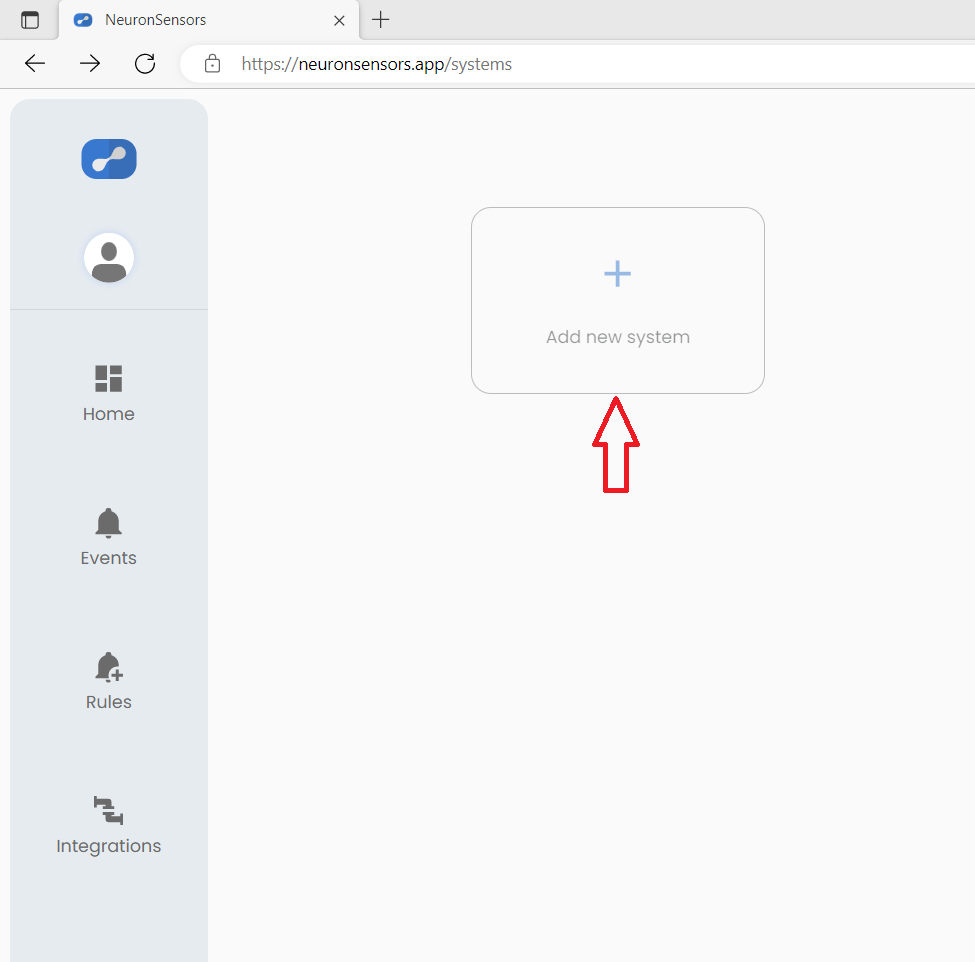
You are now ready to start creating systems and adding sensors!
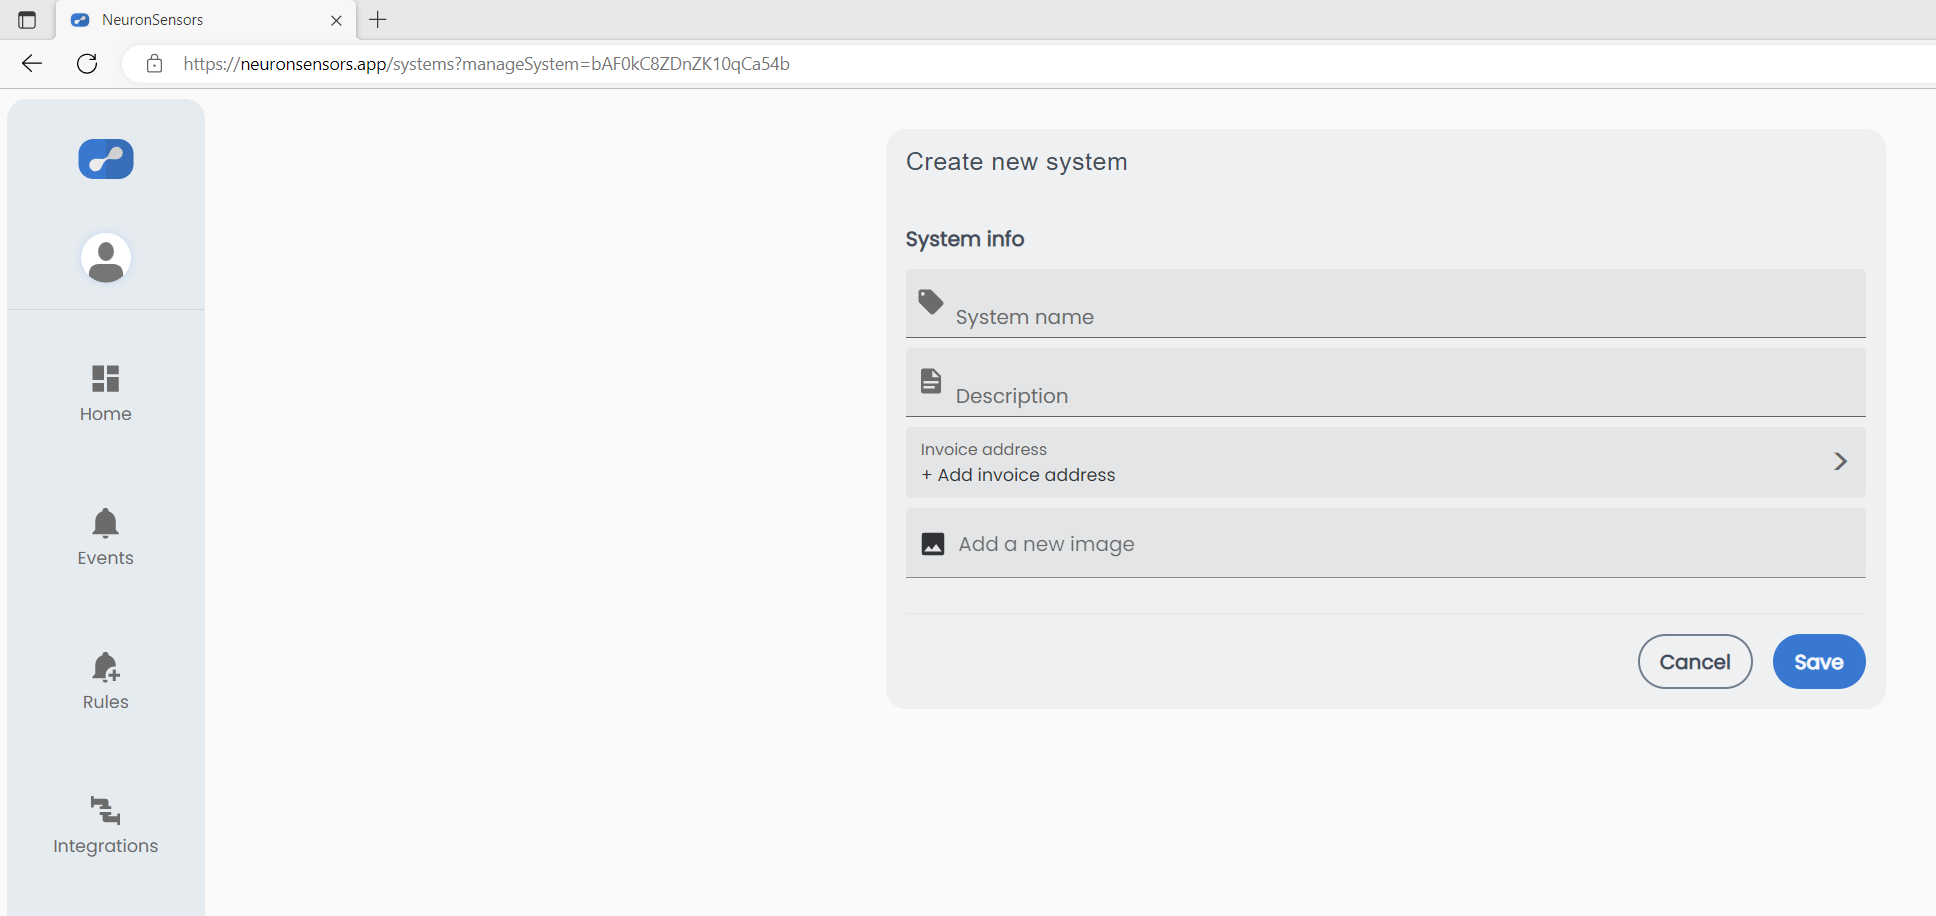
A system is a group of sensors and gateways that belong together, like a factory department or an address. Create a new system by selecting "Add new system"
Note that each system creates a individual invoice of license fee. This is advantageous when costs are to be placed on the right department, but do not create a system to organize each individual sensor, for that our group function is a better choice.
Give the system a name, and fill in information in "invoice address".
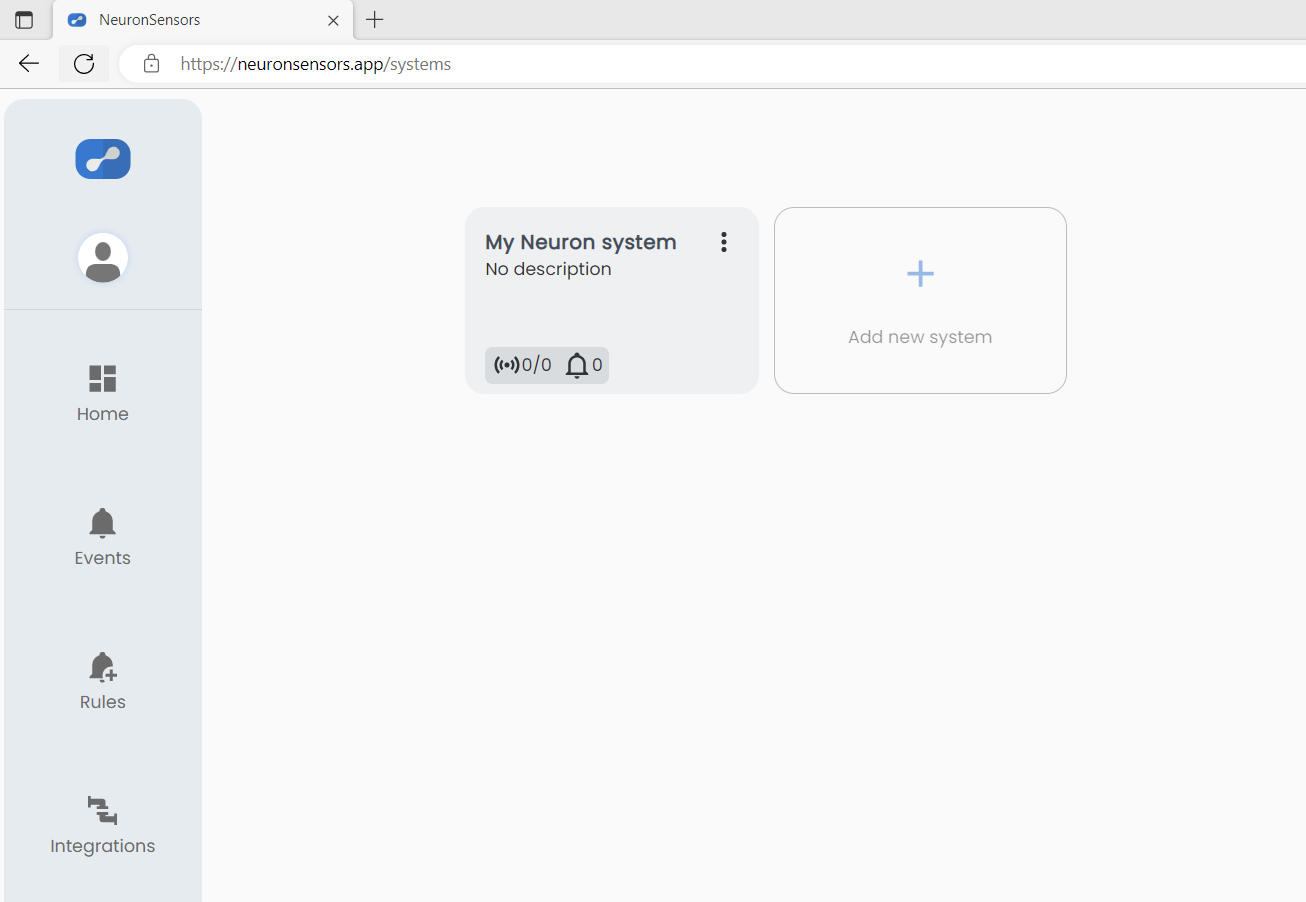
Click "Save" to finish.
If you need more detailed information, please read this article about creating a system.
Add Gateway and Sensors
Add Gateway
You are now ready to register your gateway into your newly created system!
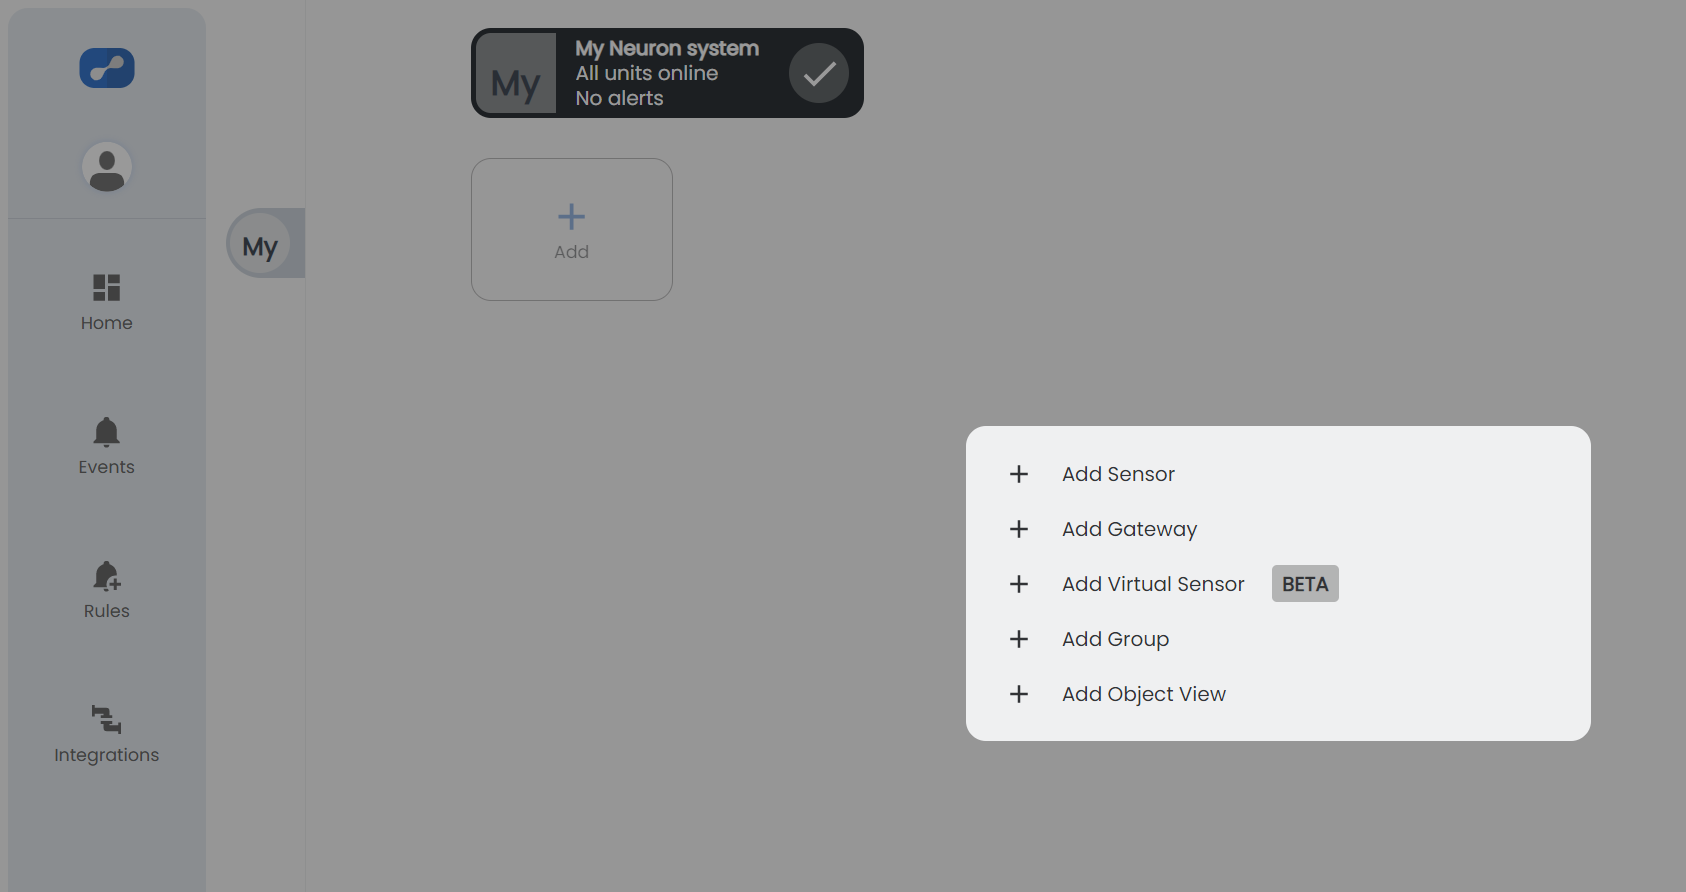
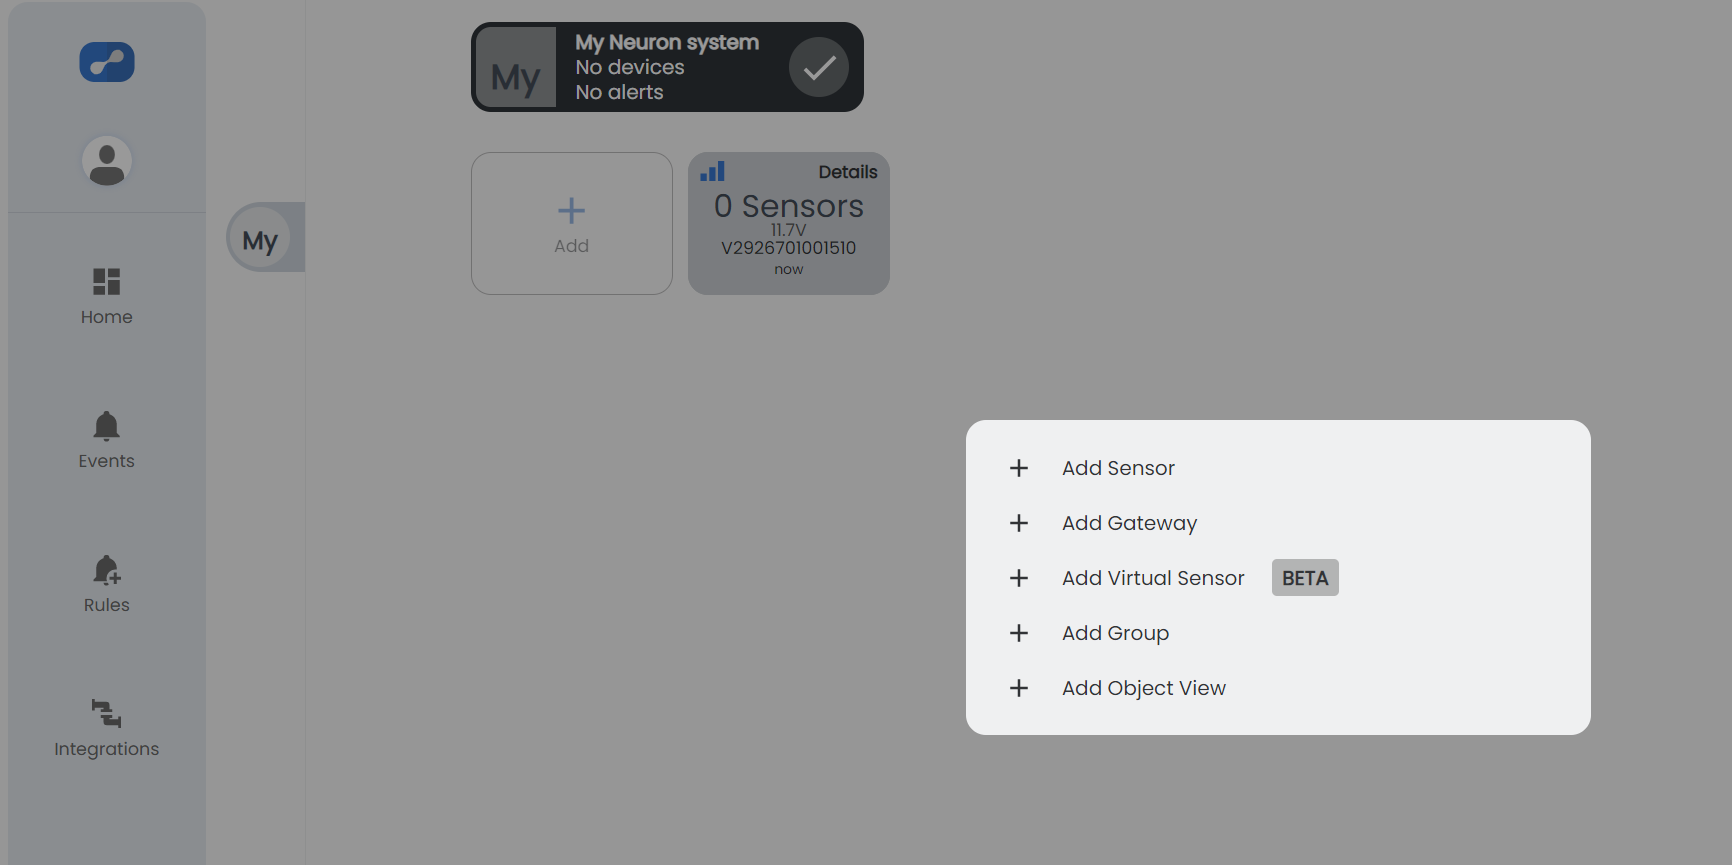
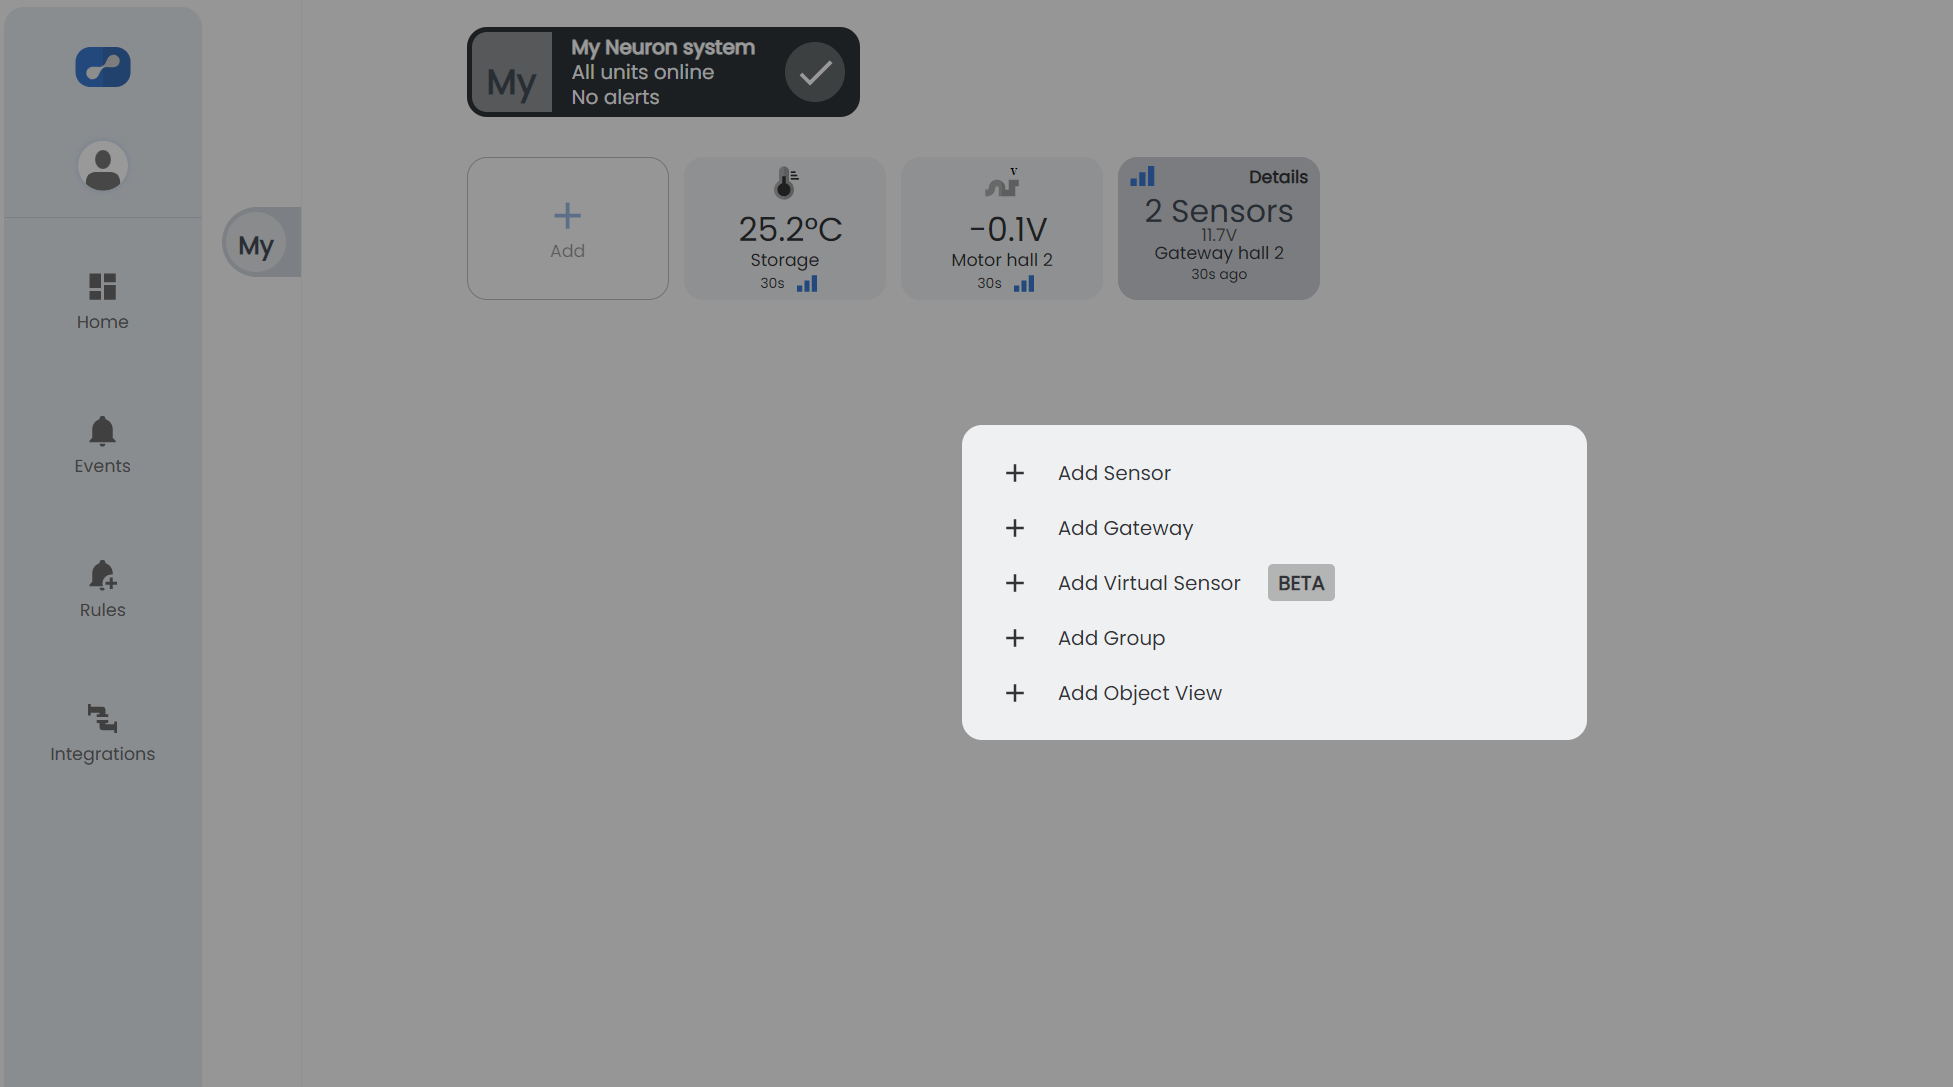
Select the "Add" button inside your system and a menu will appear where you can select "Add Gateway".
Only admin users of the system can add gateways
Fill in the gateway serial number by either scanning the QR-code or by manually entering it into the field. Optionally give the gateway an alias and a suitable description.
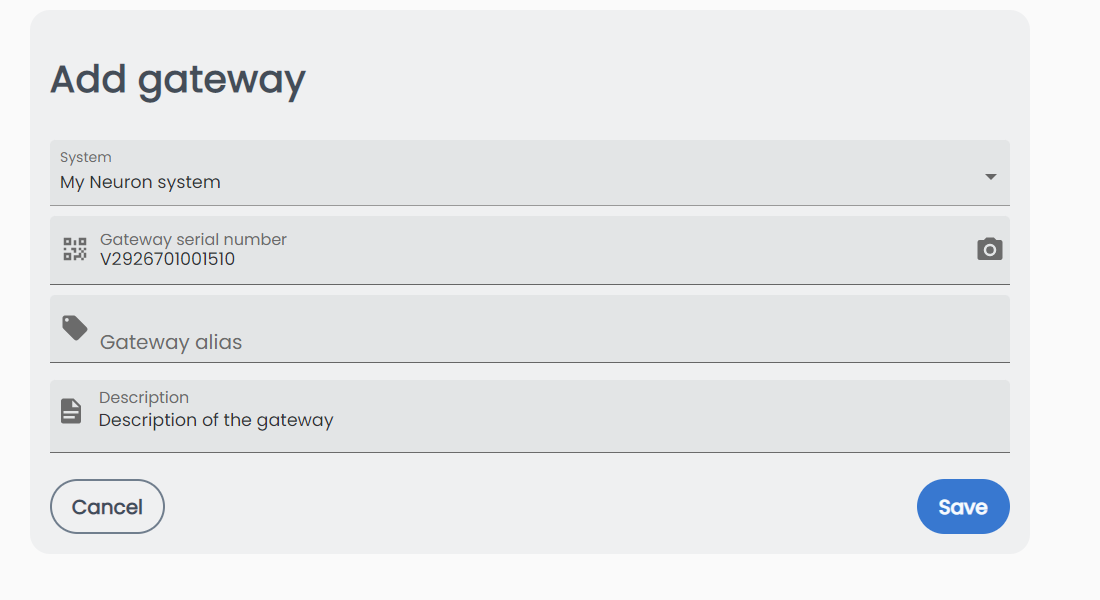
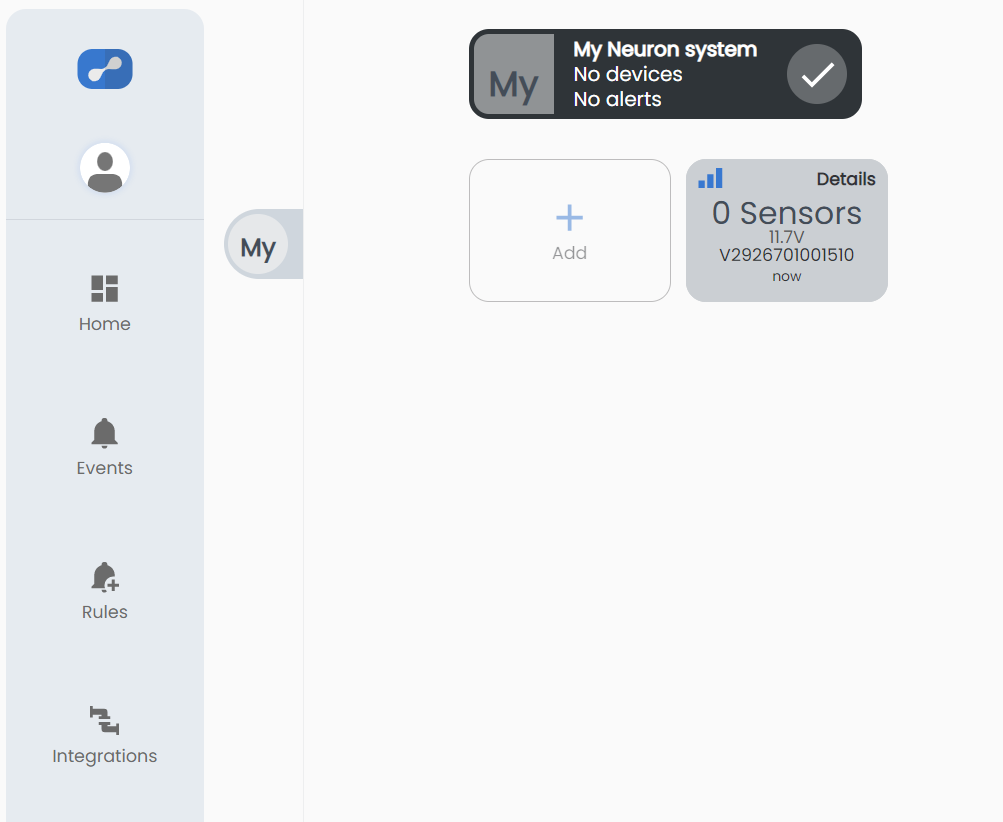
Select the "Save" button and you will be redirected back to the dashboard with your newly registered gateway.
Your gateway may appear as "offline" at first if it has not yet had time to send back a heartbeat signal to the cloud. The gateway should send this signal within 10-15 minutes after powered on.
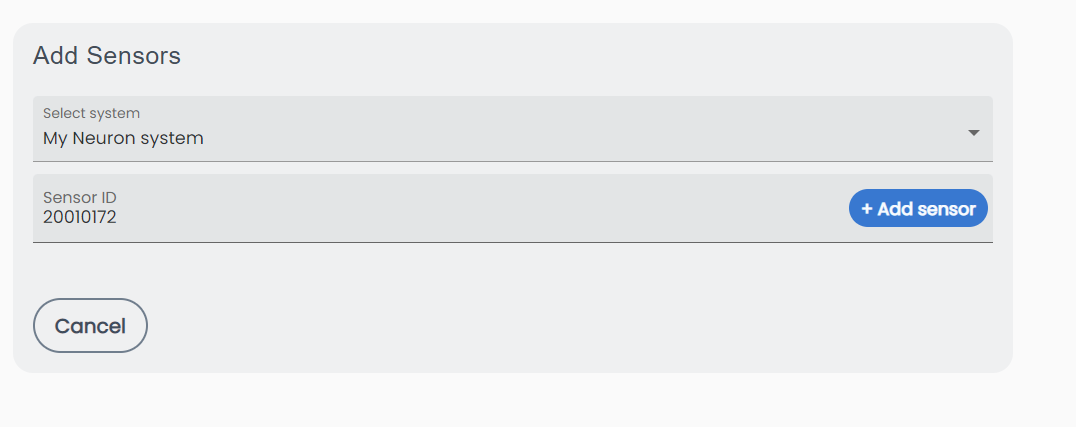
Add Sensors
Repeat the steps as explained in adding a gateway, but instead choose "Add sensor" in the menu.
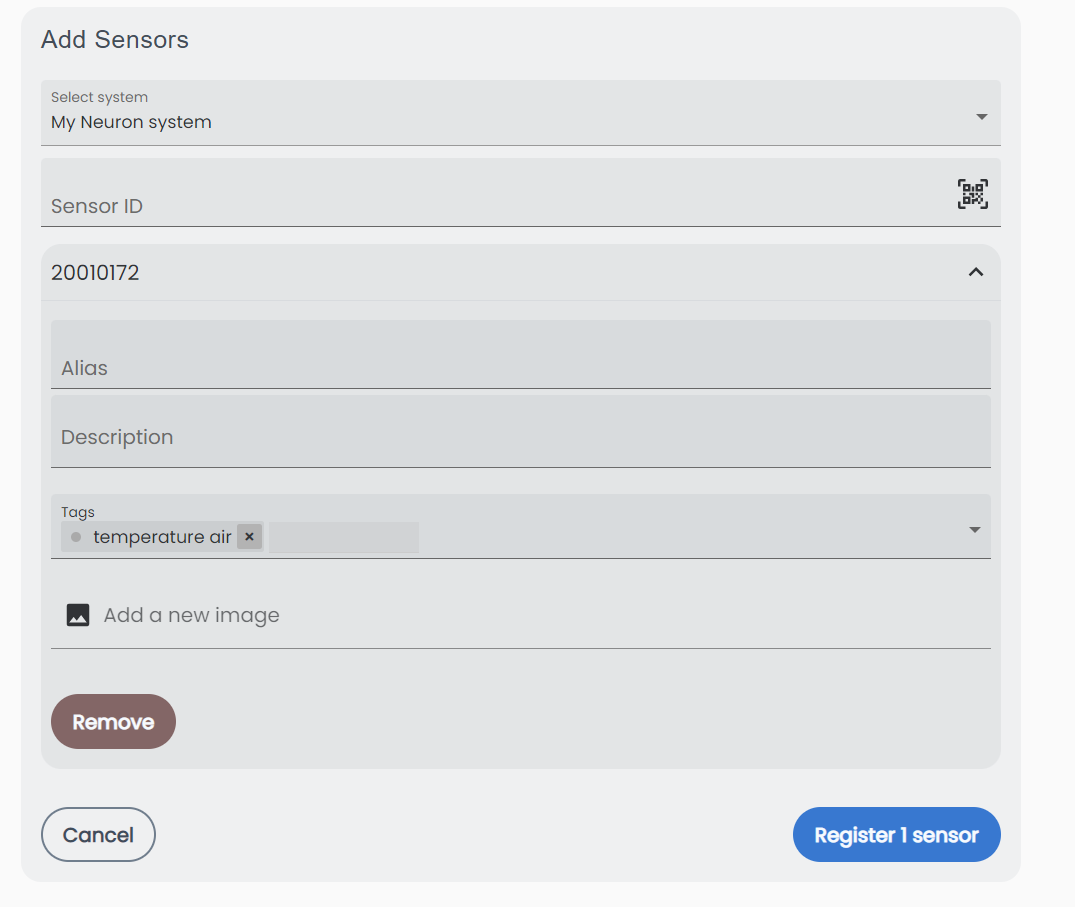
Fill in the sensor ID by either scanning the QR-code or by manually entering it into the field. Optionally give the sensor an alias, a suitable description and a image
You can also add some tags on the sensor as explained in this article: Tags. By giving the sensor a personal tag, it gets ready to use in a object view.
Only admin users of the system can add sensors.
Click on "Add sensor" button and you will be taken to the next page where you can either add another sensor or upload the already registered sensor to your system.
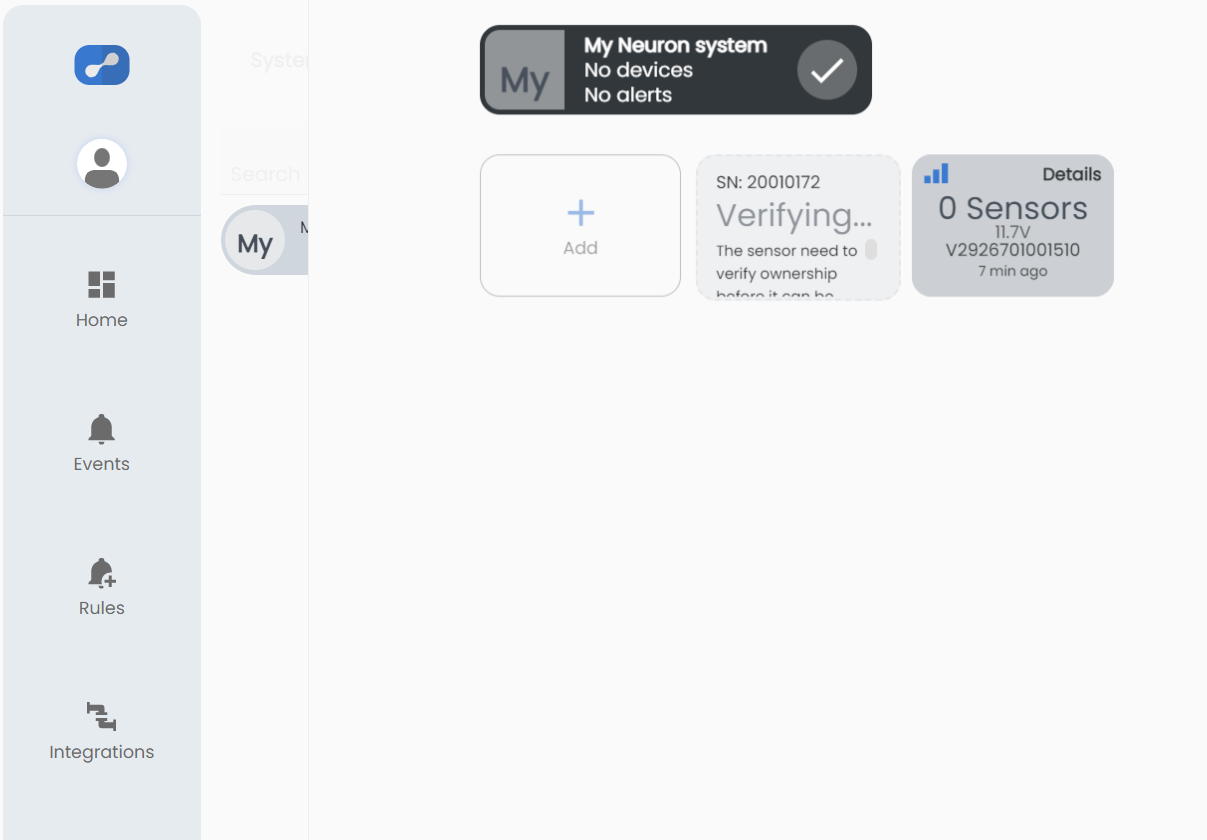
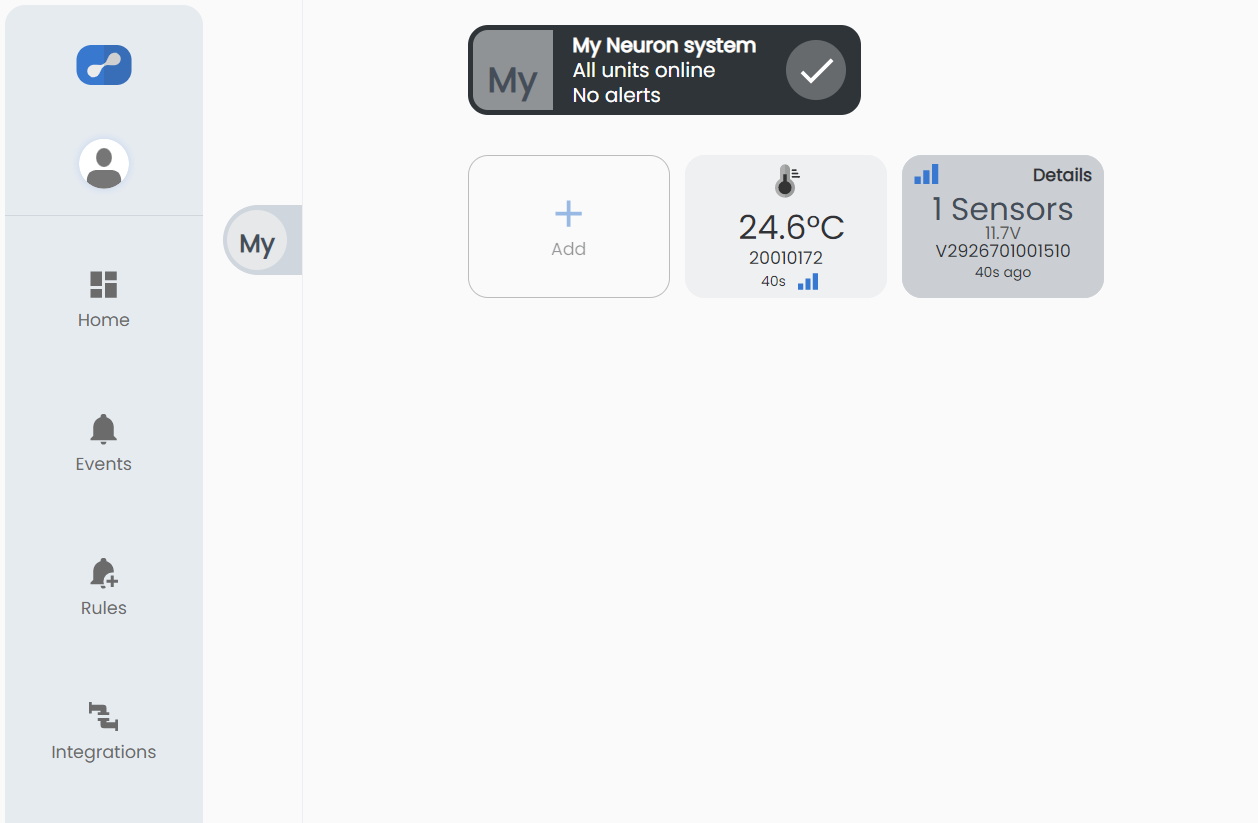
You will now be redirected back to the dashboard and the new sensor will appear as a tile next to the gateway.
Newly added sensors need to be verified in the cloud before they are fully functional. This usually happens instantaneously or within a few minutes.
For verification to succeed, the sensor needs to send a data packet through a gateway registered to the same system. Make sure the gateway is powered and online, as well as keeping the sensor within range of the gateway.
Create sensor group
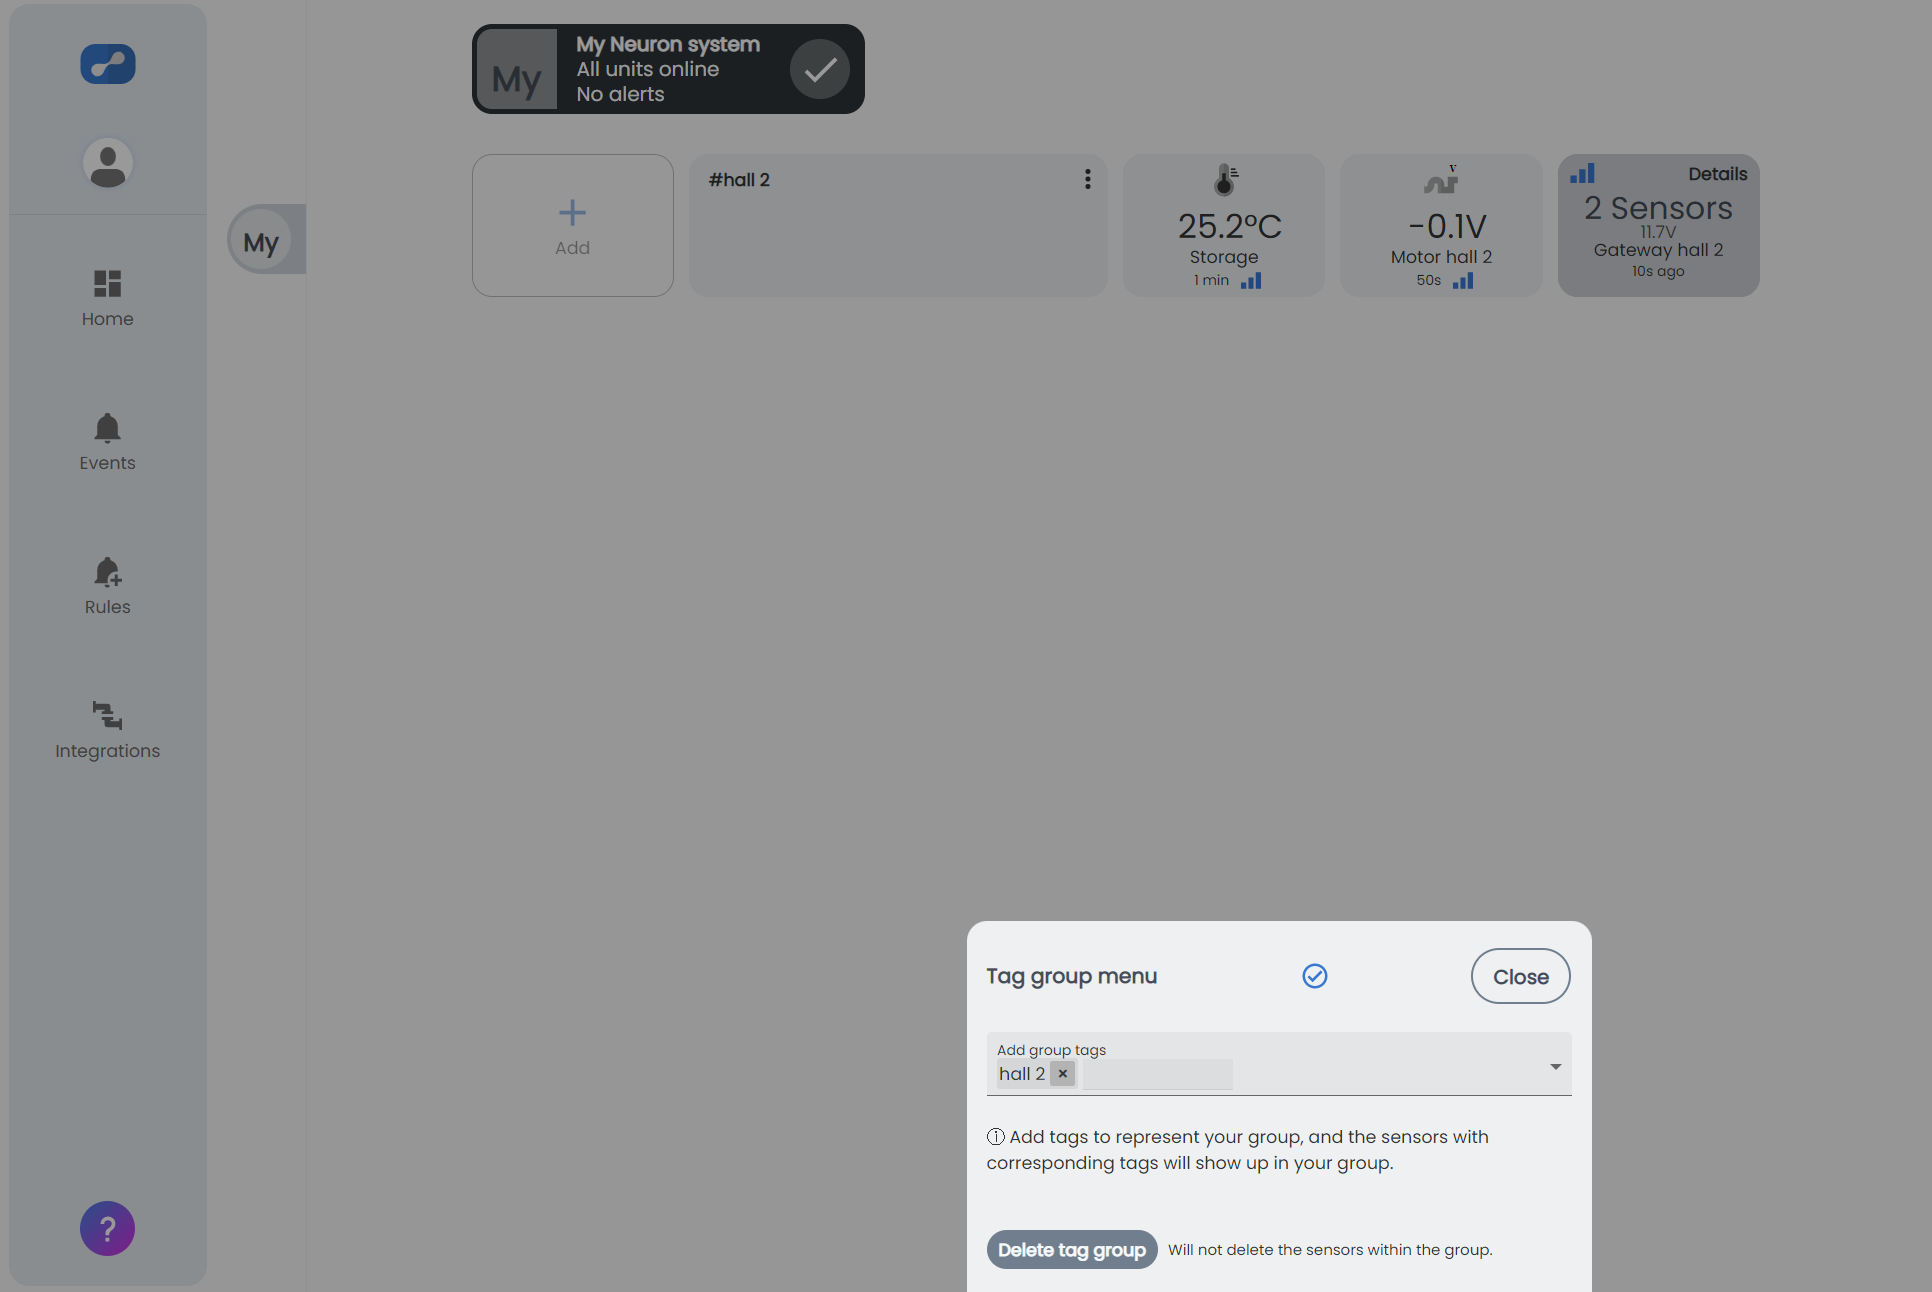
It may be appropriate to create different groups in the system to sort sensors. Start by pressing "Add" and then "Add group".
The groups are sorted by tag. Give the group a tag/name.
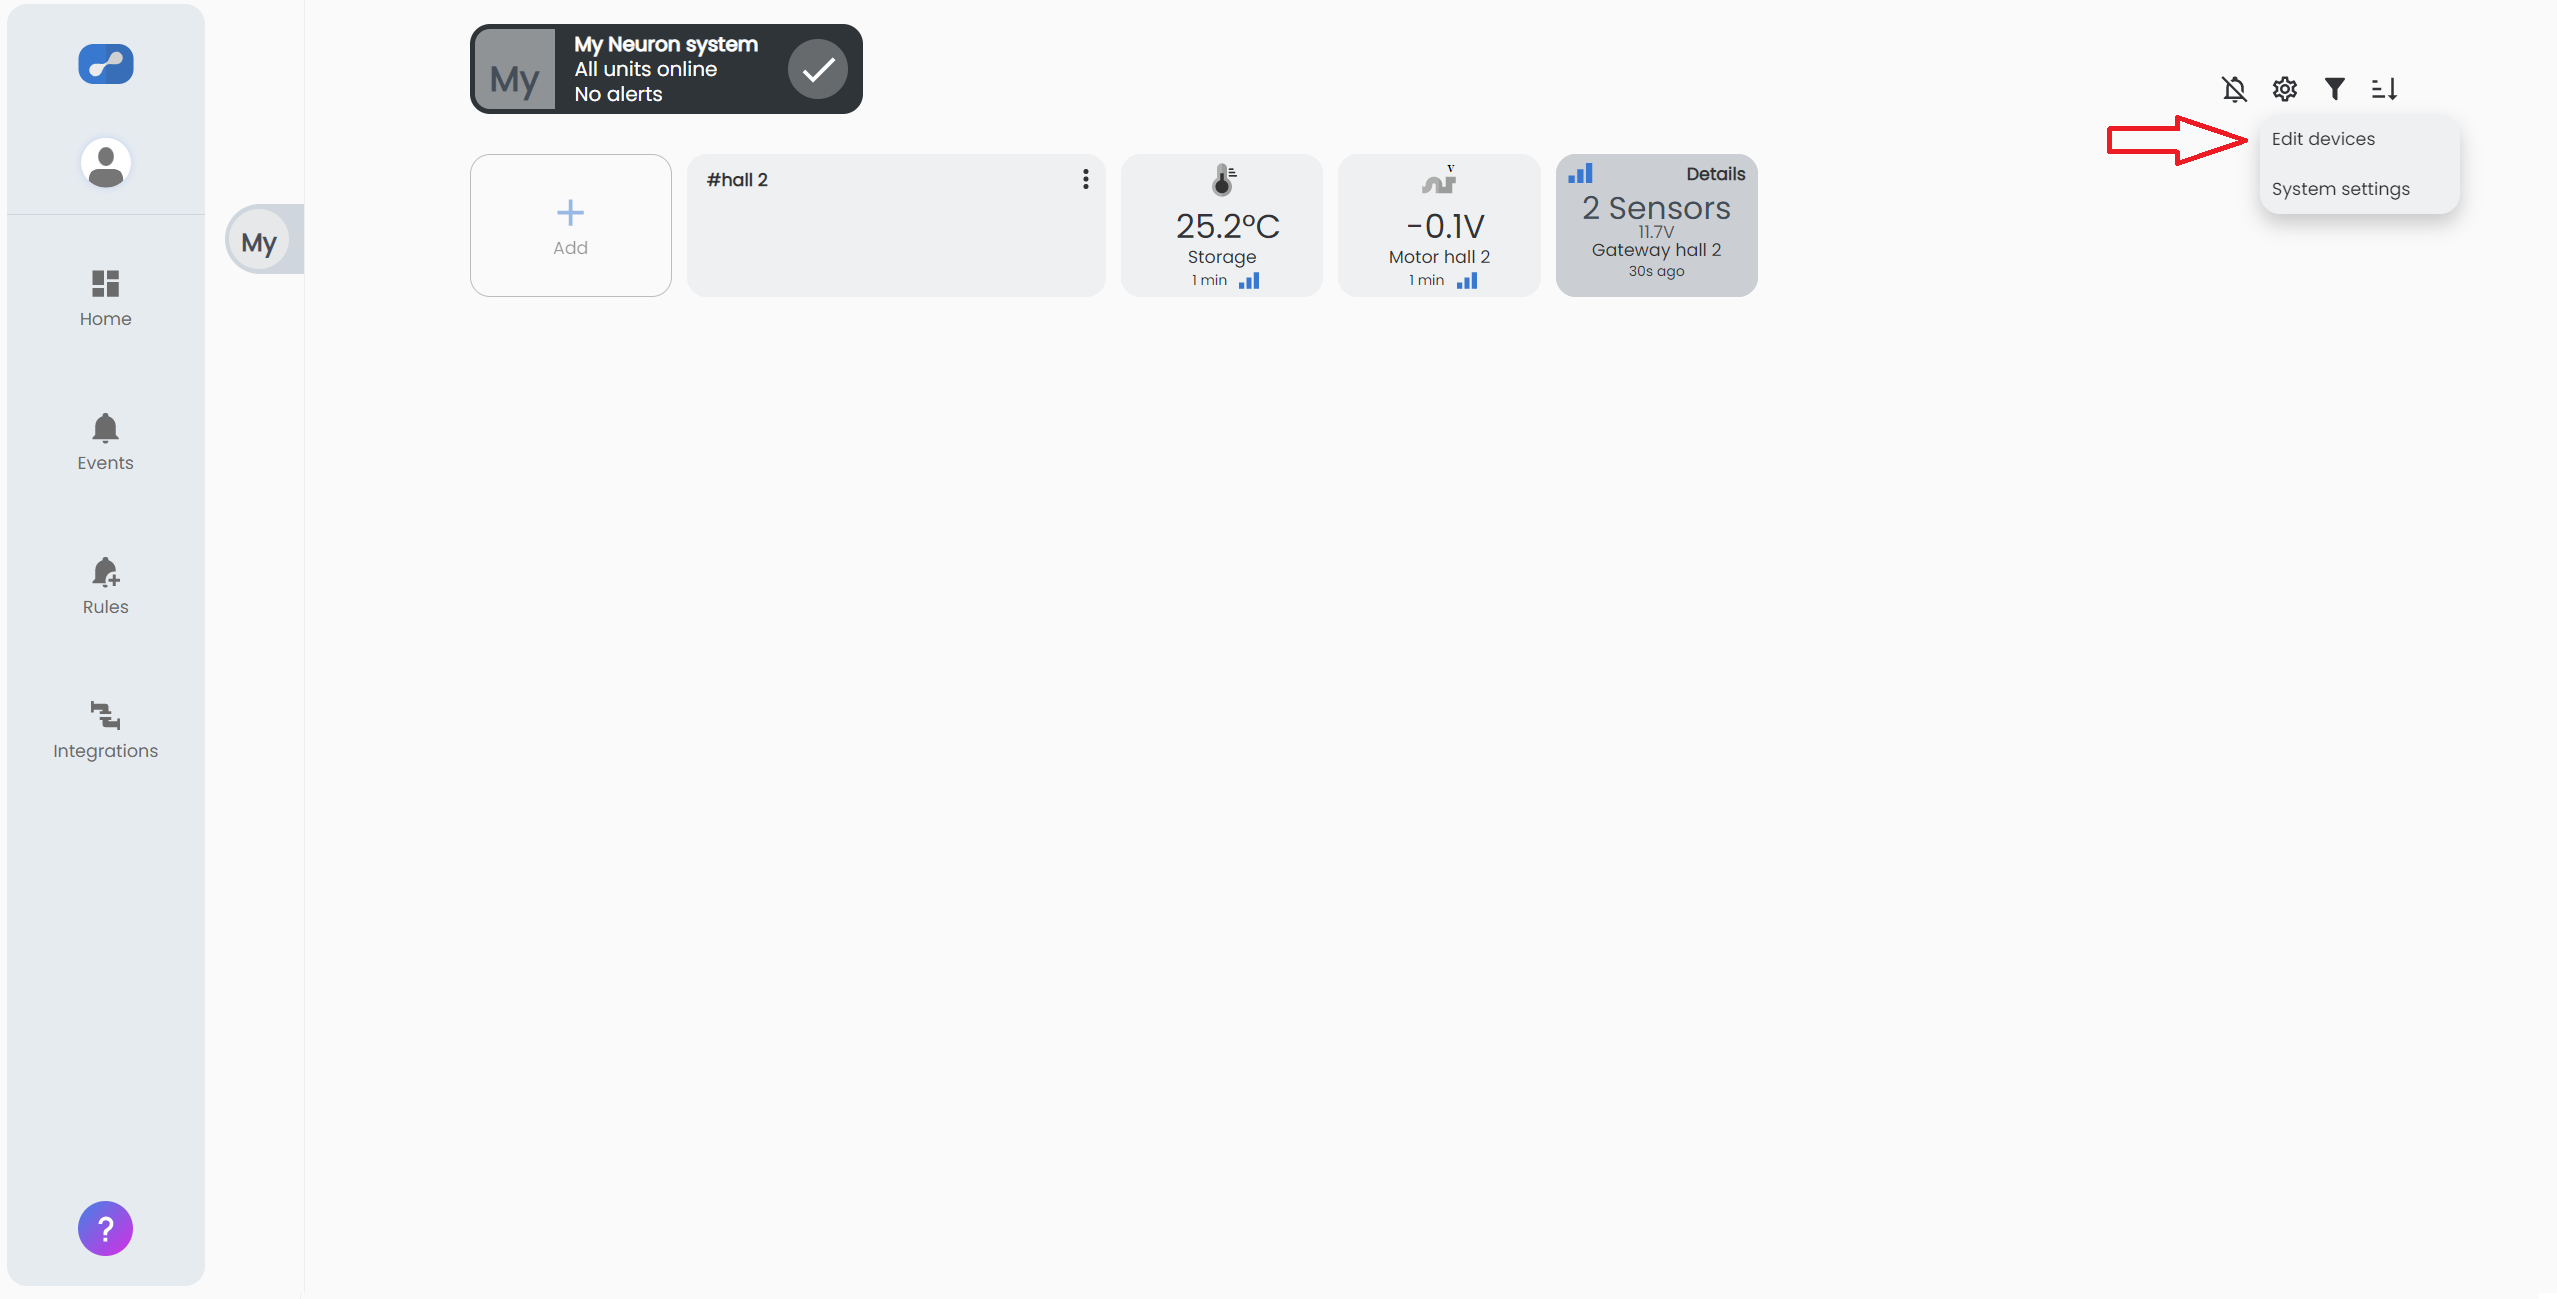
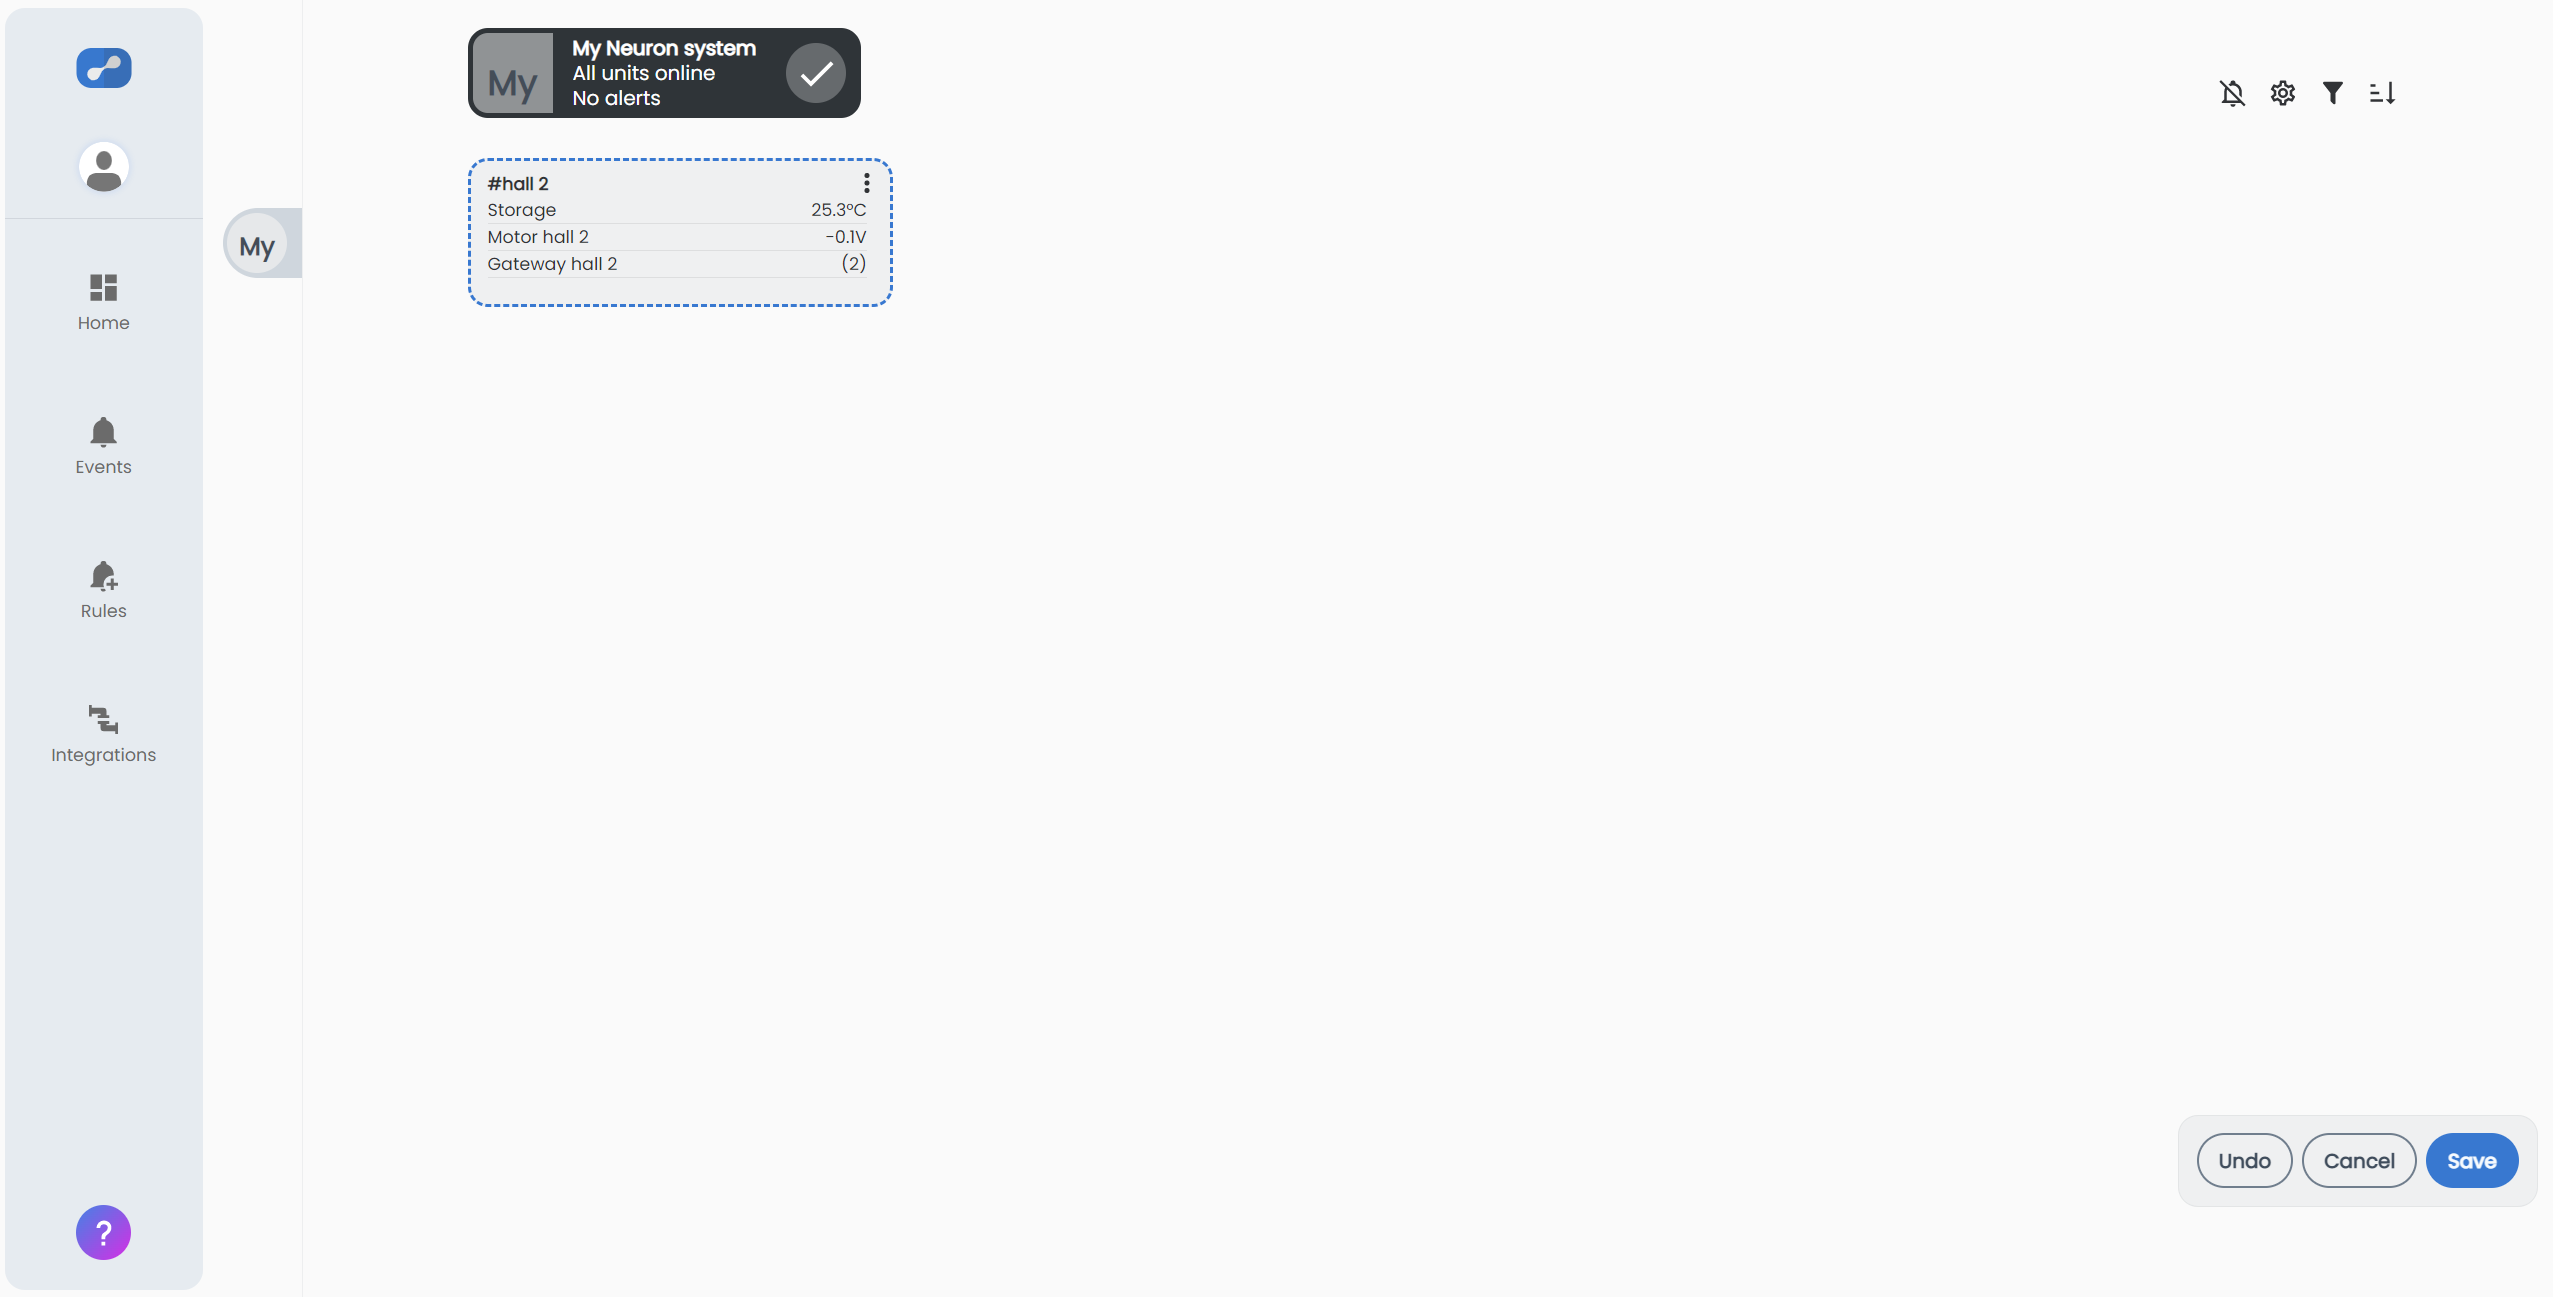
There are two ways to move sensors into a group. 1) Give each sensor the same tag as the group name. 2) press the settings icon and further "Edit devices". It is then possible to drag sensors and gateways into the desired group. Finish by pressing "Save".
The sensors are now in your group. A sensor can be added to several groups by adding different group tags.
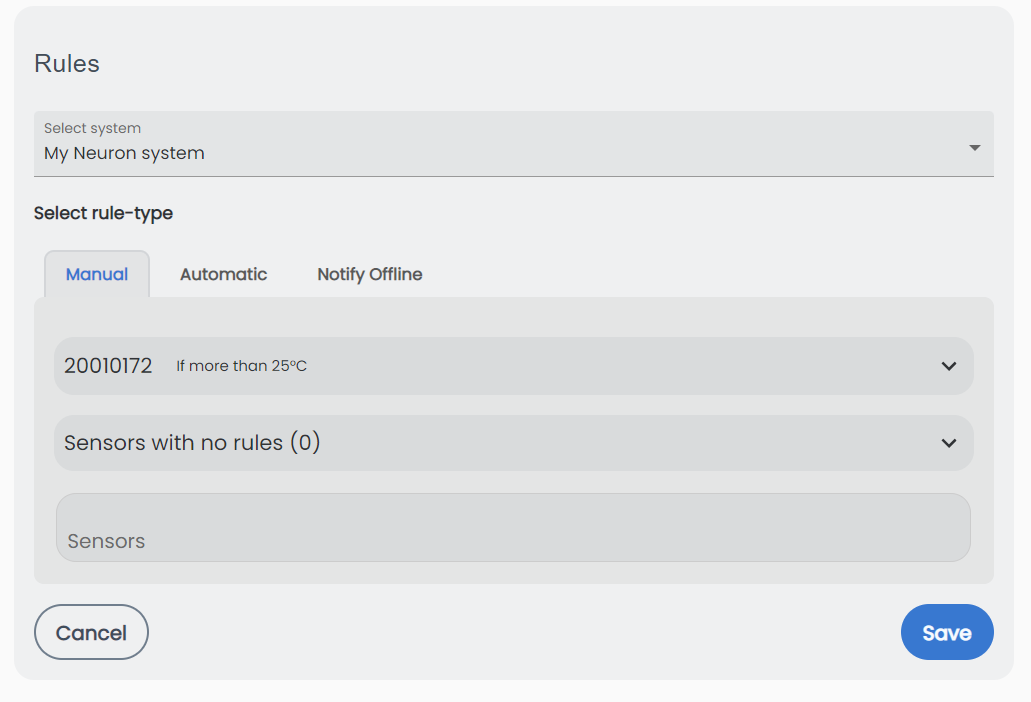
Rule
To receiving notifications when measured values are outside bound, it is important to make rules. Navigate to "Rules".

Find the sensor you want a rule for, and select the "+ Add rule"-button.

Choose the measurement unit, the logical operator and the value limit for the custom rule. You also have more options under "Advanced settings". More information: New rule
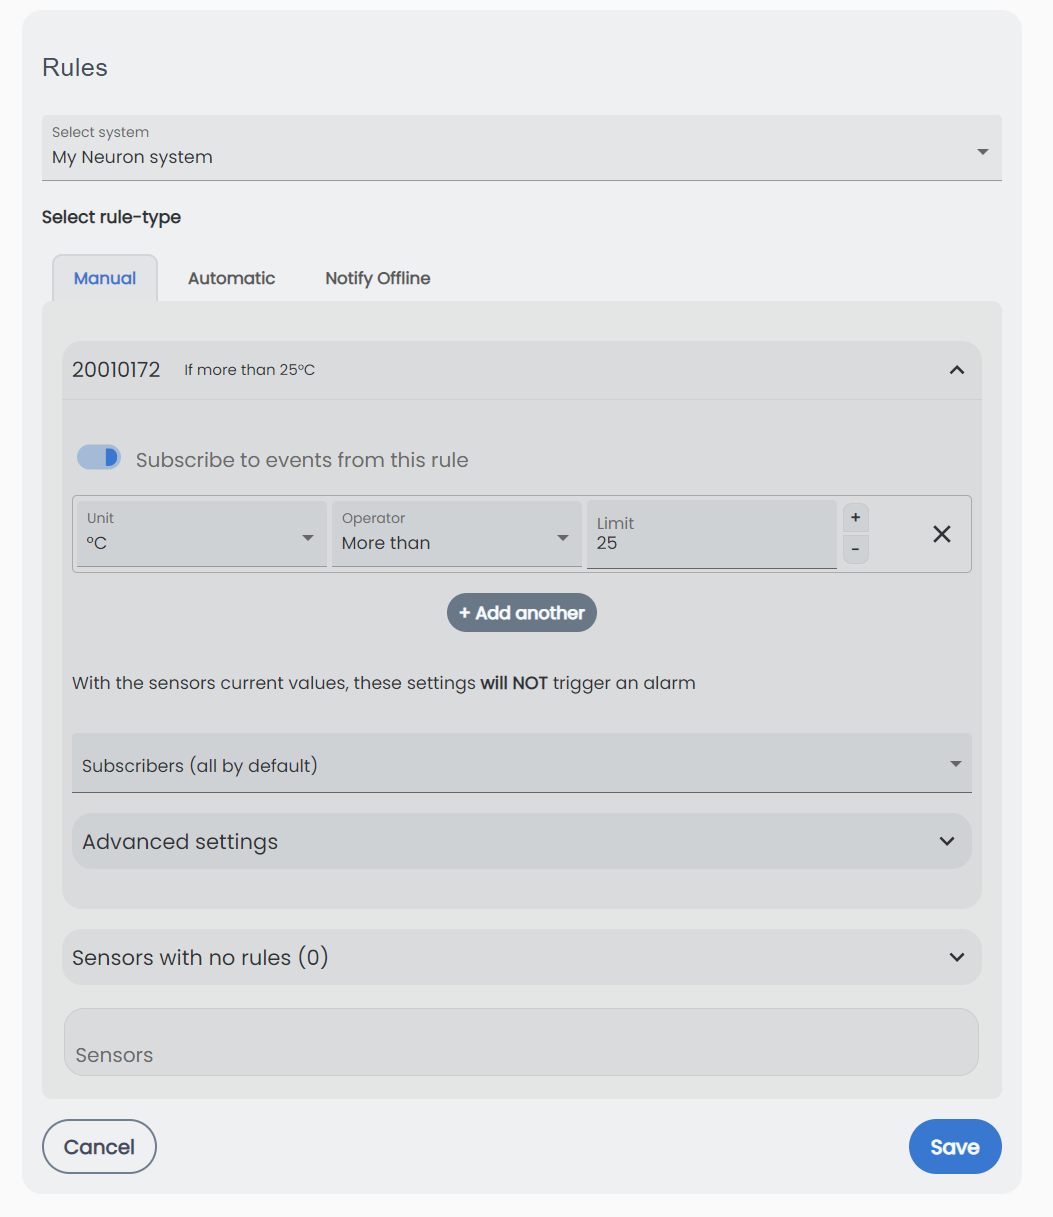
Click "Save" to finish.
Congratulations! You are now ready to take advantage of this awesome Neuron sensor platform!
What's next?
You are now finished with the basic setup! Here are some articles on more in-depth functionality with Neuron Sensors.